





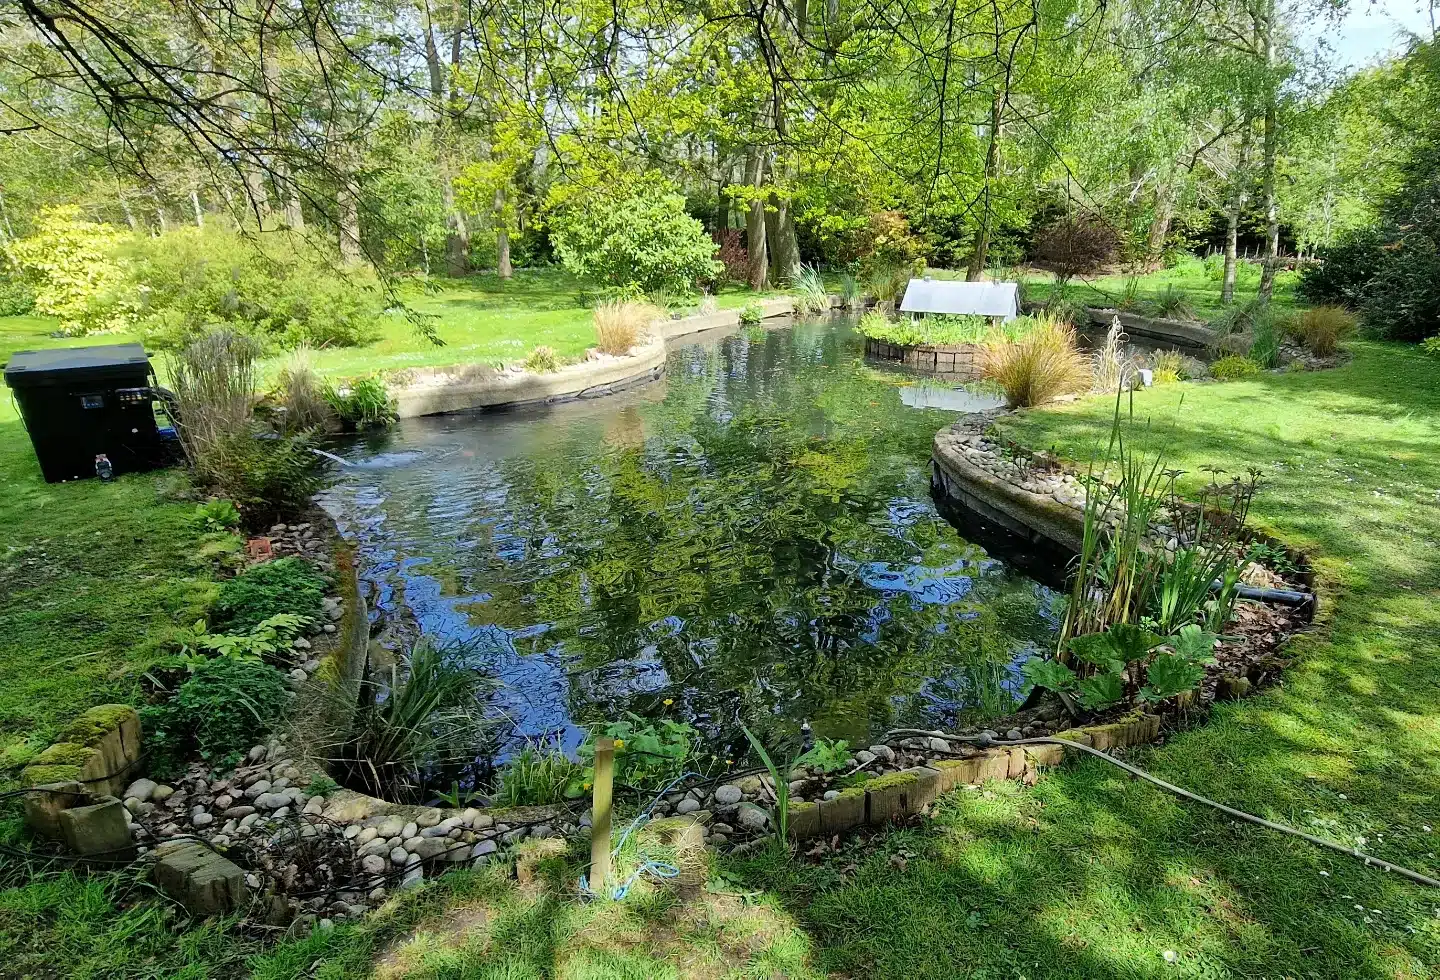
Oase ScreenMatic Pond Filter Guide: Sizes, Setup and Cleaning
Choosing and looking after an Oase ScreenMatic filter
We install Oase ScreenMatic filters regularly, as well as looking after the ponds they run on. They are a useful option when you want a pump-fed filter that removes much of the coarse waste before it reaches the foams. That makes cleaning easier, but the filter still needs to be sized properly, installed with a free-flowing return and checked as the pond changes through the year.
This guide covers the BioTec ScreenMatic² 40000, 60000, 90000 and 145000: how they work, which size to choose, our complete 145000 kits and the smaller OC sets, and how to clean them without undoing the biological filtration. If you already have one, the cleaning, sensor and winter sections will help you make sense of what it is doing.
The first thing to know: the model number is the maximum pond volume without fish. A ScreenMatic² 60000 is rated by Oase for up to 30,000 litres with fish, or 15,000 litres with koi. Those are maximum ratings, so fish size, feeding and the rest of the system still matter.
How does the ScreenMatic pond filter work?
A pond pump sends water to the filter above pond level. Where a UVC (ultraviolet clarifier) is fitted, the water passes through that first. It then spreads across the moving screen, flows through the foam section and leaves the filter by gravity. It is an open flow-through filter: the water leaving it needs a clear route downhill to the pond.
The screen takes out coarse waste
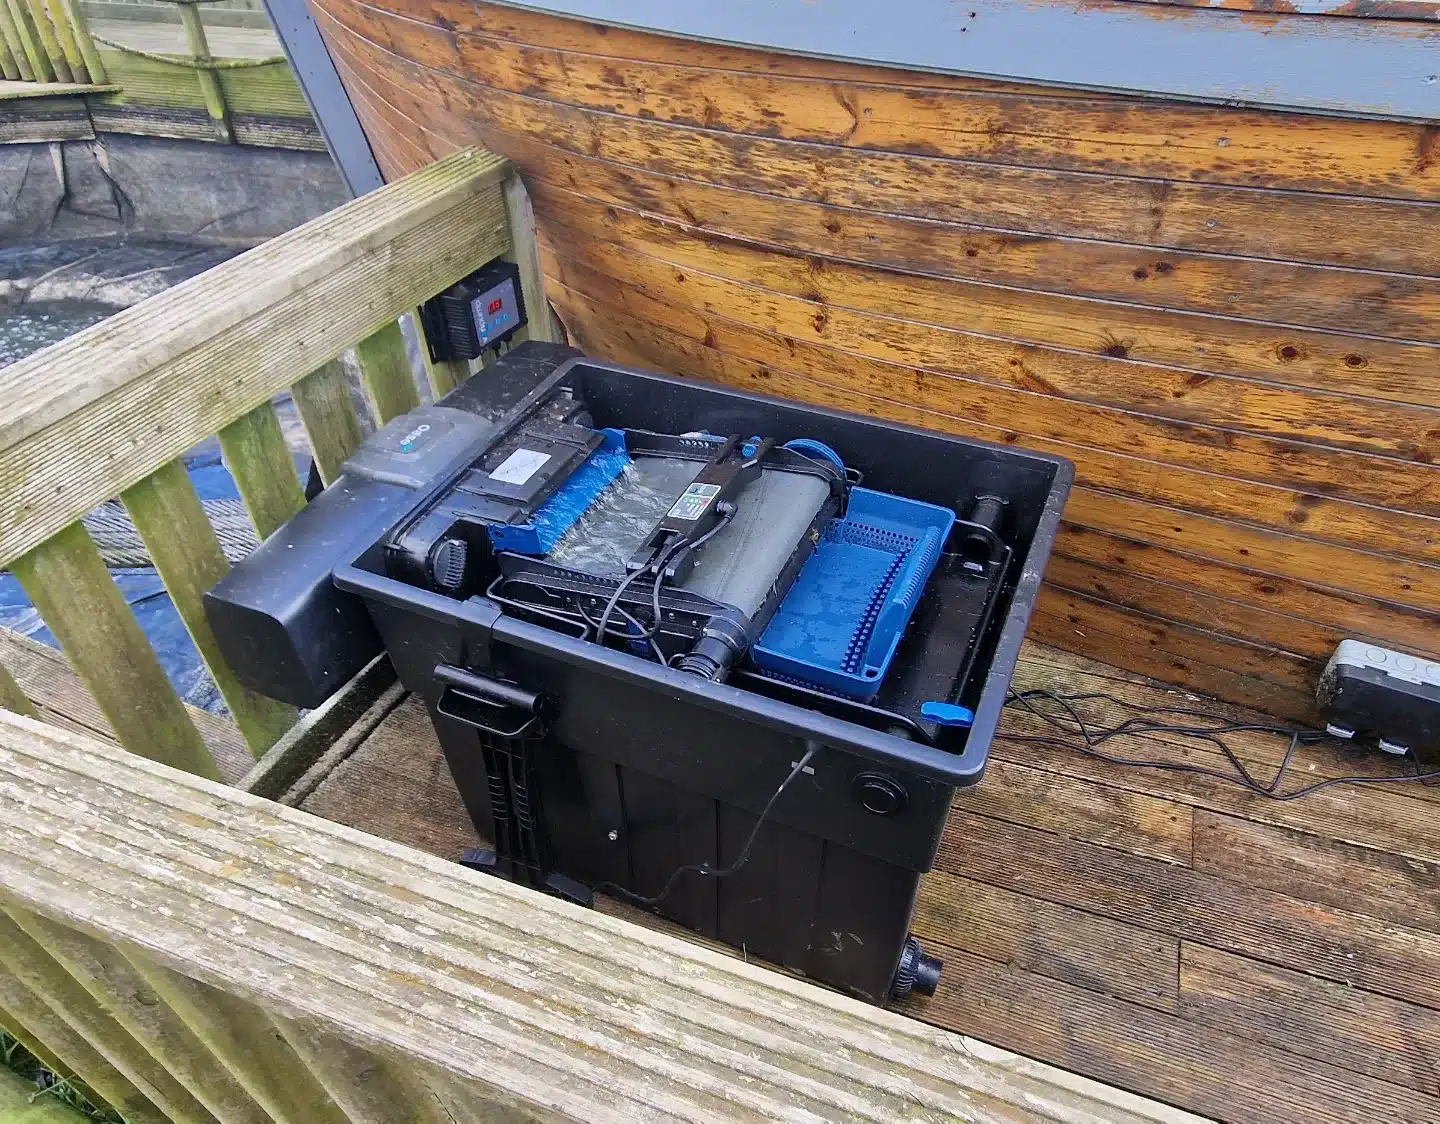
The ScreenMatic² screen has a 300-micron mesh. It catches coarse particles before the water reaches the foams. As waste builds up, water rises on the screen and touches the sensor beneath the controller. The motor then moves the belt and the scraper transfers the collected material into the debris tray. You empty that tray by hand.
The sensor is responding to the water on the screen; it is not directly measuring how dirty the pond is. That is why the controller position and the amount of water arriving at the filter need to be right. Nor does a 300-micron screen remove every fine particle. Some finer material reaches the foams, which is part of their job.
The foams provide mechanical and biological filtration
The blue, red and purple foams catch remaining particles and provide surfaces for beneficial bacteria. Those bacteria convert ammonia from fish waste into nitrite, then nitrate. They need a steady supply of water and oxygen, and they take time to establish. Clear water alone does not tell you whether ammonia and nitrite are under control.
A new filter, or one fitted with a full set of new foams, needs to mature. Feed cautiously, test the pond water and increase feeding only as the biological filtration can cope. Our koi pond filtration guide explains this part in more detail.
The UVC is a separate part of the system
The filter on its own does not include a built-in UV lamp. Compatible Bitron clarifiers can be fitted to it, and the OC sets combine a filter, pump and UVC. A suitable UVC helps with the free-floating algae that turn pond water green. It does not replace biological filtration or remove blanketweed attached to the pond walls.
For blanketweed, look at nutrients, feeding, accumulated waste and the pond itself. Our blanketweed treatment guide covers the separate treatment choices. A pond UVC is also not a substitute for investigating illness or fish health problems.
Which ScreenMatic size do you need?
Start with the actual water volume, then use the correct column for the fish you keep. If the pond contains koi, compare the koi ratings. Buying against the no-fish figure leaves very little useful information about the waste the filter will need to handle.
| Model | Without fish | With fish | With koi | Maximum flow through filter |
|---|---|---|---|---|
| 40000 | 40,000 litres | 20,000 litres | 10,000 litres | 9,000 L/h |
| 60000 | 60,000 litres | 30,000 litres | 15,000 litres | 11,000 L/h |
| 90000 | 90,000 litres | 45,000 litres | 22,500 litres | 12,500 L/h |
| 145000 | 145,000 litres | 72,000 litres | 36,000 litres | 17,500 L/h |
These are Oase’s published maximums for the current ScreenMatic² models. Older BioTec ScreenMatic 12,18 and 36 filters, the earlier 140000 and overseas model names have different details. Check the model plate before using these figures to choose spares or set up an existing filter.
A pond of 12,000 litres containing koi is already above the 40000’s 10,000-litre koi rating. The 60000 brings it within Oase’s stated limit, but that does not settle the choice on its own. Large koi, generous summer feeding, future growth and the amount of waste arriving at the filter may justify more capacity. Equally, a bigger filter still needs the right pump and return pipe.
We ask about the fish and feeding because two ponds holding the same amount of water can place very different demands on their filters. It also helps to know whether leaves regularly fall into the pond, how much room there is beside it and who will do the cleaning. A unit that is awkward to reach is harder to keep working properly.

Check the space as well as the pond rating
| Model | Length × width × height | Number of foams | Main return connection |
|---|---|---|---|
| 40000 | 788 × 590 × 445 mm | 8 | 75 mm |
| 60000 | 788 × 590 × 545 mm | 8 | 75 mm |
| 90000 | 788 × 590 × 645 mm | 16 | 110 mm; check the supplied adaptor |
| 145000 | 1,334 × 891 × 815 mm | 18 | 110 mm; check the supplied adaptor |
The dimensions above are for the filter box. Allow extra room for a fitted UVC, inlet hoses, the return, lifting the lid and removing the debris tray. The 145000 is a much larger and heavier piece of equipment than the other three. Plan its delivery and lifting access, and never move a filter full of water.
For an unusually heavily stocked or heavily fed koi pond, it is sensible to compare filtration designs as well as sizes. A Nexus moving-bed filter or a suitable drum-and-biological system may better suit the pond and the cleaning routine you want. ScreenMatic is one useful option, rather than the answer to every pond.
Buying a ScreenMatic: filter only, OC set or our 145000 kit?
The filter-only models suit an upgrade where you already have a suitable pump and UVC. An OC set gives you a packaged combination. That can make choosing the main components simpler, but it does not include every fitting needed for every installation.
| OC set | Filter | Pump | UVC |
|---|---|---|---|
| 40000 Set OC | ScreenMatic² 40000 | AquaMax Eco Premium 13000 | Bitron C 36 W |
| 60000 Set OC | ScreenMatic² 60000 | AquaMax Eco Premium 17000 | Bitron C 55 W |
| 90000 Set OC | ScreenMatic² 90000 | AquaMax Eco Premium 21000 | Bitron C 110 W |
Check the current product listing for the exact set contents and pump generation before ordering. Set names and equipment can change. The larger number on the pump is not permission to send that amount of water through the filter: the pump’s delivery changes with height and pipework, and the filter’s flow limit still applies.
“OC” refers to the Oase Control connectivity of compatible equipment in the set. It does not mean that the ScreenMatic belt can be controlled remotely as a complete smart filter. Oase says a compatible Garden Controller Cloud or FM-Master Cloud is needed to use the Control functions. Check which functions your particular pump supports before buying a controller.
Our ScreenMatic 145000 complete filter kits
We also offer our own ScreenMatic 145000 complete filter, pump and UV kit. This brings together the larger ScreenMatic² 145000, an Oase AquaMax Eco Premium 21000 pump and your choice of Bitron Eco 120 W, 180 W or 240 W. It is a separate package from the smaller factory OC sets in the table above.
All three choices use the same filter and pump. The choice is the UVC: fitting a more powerful UV does not increase the filter’s biological capacity or turn the 145000 into a filter for a 145,000-litre koi pond. Its current Oase koi rating remains up to 36,000 litres, with fish size and feeding taken into account.
| Our complete kit | Filter and pump included | UV choice |
|---|---|---|
| 145000 kit with 120 W UV | ScreenMatic² 145000 and AquaMax Eco Premium 21000 | Bitron Eco 120 W |
| 145000 kit with 180 W UV | ScreenMatic² 145000 and AquaMax Eco Premium 21000 | Bitron Eco 180 W |
| 145000 kit with 240 W UV | ScreenMatic² 145000 and AquaMax Eco Premium 21000 | Bitron Eco 240 W |
The kit covers the main filtration equipment. It does not include an air pump or the site-specific hoses, rigid return pipe, valves and fittings. Those need choosing around where the filter will stand and how the water will get back to the pond. Check the product page for the current contents and selected option before ordering.
The 21000 pump still needs setting up for the filter. Its name describes a maximum pump figure, while the 145000 filter accepts up to 17,500 litres an hour. The height, hose and UV will reduce delivery, but do not assume they reduce it by the right amount. Check the flow arriving at the filter and adjust the pump within the equipment’s limits.
Choosing between the Bitron Eco 120 W, 180 W and 240 W
We look at pond volume, fish, sunlight, previous green-water problems and the water passing through the UV. A larger lamp rating on its own does not tell you which unit to buy. Check the specific Bitron Eco model’s pond ratings and permitted flow, then match it to the pond and the rest of the equipment.
The Bitron Eco information from Oase explains the UV’s separate operating requirements. Leave access for its lamp and quartz-sleeve maintenance when planning the filter position. An installation squeezed into a small enclosure may look tidy on day one and be awkward to service later.
We have fitted the 145000 with both 180 W and 240 W Bitron Eco units, as the installation photographs below show. Those are examples of equipment chosen for particular ponds. If you are unsure which kit suits yours, send us the pond volume, fish details and a few photographs so we can look at the whole setup.
Choosing a pump and getting the flow right
The pump has to lift water from the pond to the filter and push it through the hose, bends and UVC. That reduces the amount of water it delivers. Compare its flow at the height of your installation, rather than choosing from the largest number on the box.
We recommend a suitable variable pump where it gives you useful control over the flow. It makes it easier to adjust the water arriving at the filter within the equipment’s limits. Oase AquaMax pumps are designed to work with this range, but a filter-only installation can use another suitable pond filter pump if its fittings, flow and operating requirements match.
Keep within the lowest limit in the system: the filter, UVC and return all matter. A 60000 may accept up to 11,000 litres an hour, but a restricted return can cause trouble well below that figure. Increasing the pump speed to compensate for blocked foams is not the right fix.
Check the water coming back to the pond. A stronger pump cannot force water uphill from a ScreenMatic outlet. If the return is undersized, blocked or laid badly, water can back up inside the filter. Get the return right before turning the pump up.
Our pond pump sizing guide explains height, hose losses and pump curves in plain English. You can also compare pond filter pumps once you know what the installation needs.
Does the ScreenMatic need an air pump?
It does not use an air pump to move the screen or clean the foams. Pond aeration is a separate decision. Fish and filter bacteria both need oxygen, and warm water, heavier feeding and stocking increase the importance of a reliable supply. A splashy return can help, but do not assume it provides everything a stocked koi pond needs. Our pond aeration guide explains air pumps and diffusers.
ScreenMatic installations from our own pond work
We fit these filters on existing ponds as well as during larger upgrades. The examples below show different sizes and UV combinations we have installed. They are individual jobs, rather than a shopping list to copy: the pond, fish, feeding, sunlight and pipework all influence what we choose.
| Filter we installed | UVC on that job | See the installation |
|---|---|---|
| ScreenMatic 40000 | Bitron 55 W | Our installation photographs |
| ScreenMatic 90000 | Bitron 110 W | Our installation photographs |
| ScreenMatic 90000 | Bitron Eco 240 W | Our installation photographs |
| ScreenMatic 145000 | Bitron Eco 180 W | Our installation photographs |
| ScreenMatic 145000 | Bitron Eco 240 W | Our installation photographs |
Some of these installations pre-date the current OC packages. A Bitron fitted on one of our jobs should not be confused with the UVC supplied in a current boxed set. For a new purchase, use the product listing and the requirements of your own pond.
Two ways we have fitted the larger 145000
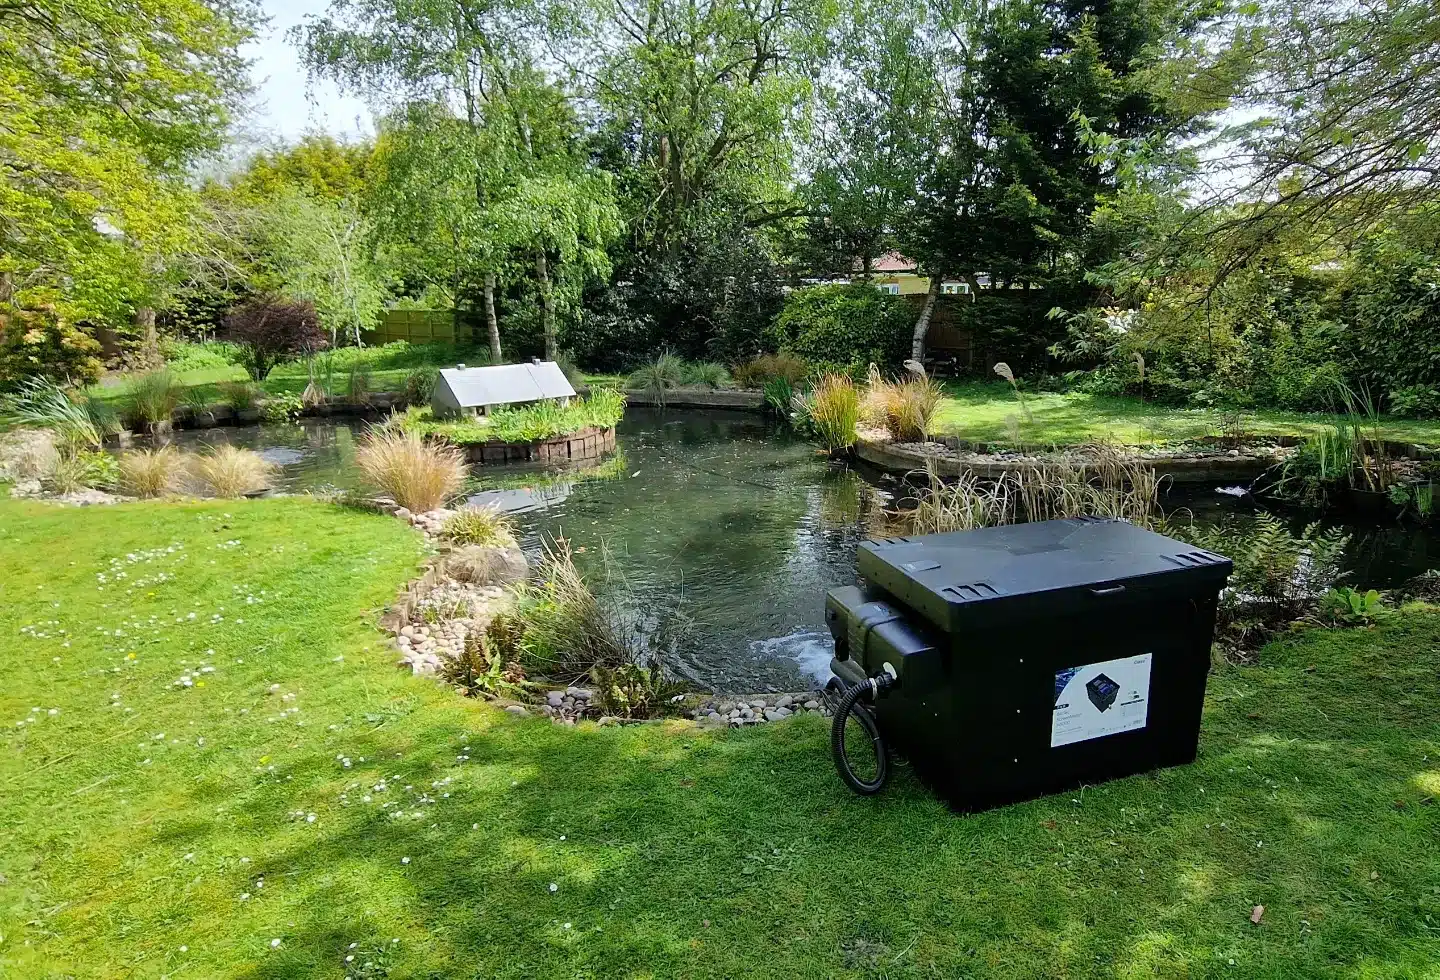
The 145000 needs considerably more space than the smaller boxes. In one of these jobs it stands beside the pond; in the other it sits within the structure behind a waterfall. Wherever it goes, we still need room to open it, remove the debris tray and reach the drain. Enclosing a filter should not make routine cleaning awkward.

Installing a ScreenMatic: what needs planning?
A firm, level base and room to clean it
The filter is heavy when full. Use a solid, level base that will support it without sinking or twisting. Slabs need properly prepared ground beneath them; a suitable concrete base may be preferable. Leave enough space to lift the lid, hinge up the screen assembly and remove the tray and foams without fighting the pipework.
We also plan where the dirty water will go. The waste drain needs an accessible route that will not send the cleaning water back into the pond or leave it collecting around the filter. Keep the drain valve reachable and follow local requirements for disposing of pond waste water.
The return must drain freely
Position the filter outlet above the point where water returns to the pond. Give the return pipe a continuous fall, use the correct size and avoid unnecessary restrictions. A waterfall is possible only when the filter outlet is high enough for water to reach the top by gravity. The ScreenMatic cannot sit below a higher waterfall and pump water out to it.
Do not reduce a large outlet to a small hose just because it is easier to hide. Check the exact outlet and adaptor arrangement for your model, and keep the return clear of leaves, roots and obstructions. Pipe sizes printed in different naming systems are not always interchangeable, so check the actual fittings before gluing anything.
Hoses, the UVC and electrical positioning
Choose the largest suitable inlet hose supported by the equipment, keep the run sensible and fit the correct seals and clips. Cut stepped hose tails to the diameter being used where the instructions require it; leaving smaller unused steps in place can restrict flow.
The Oase manual distinguishes between a filter with a fitted UVC and one without. With a fitted UVC, it specifies at least 2 metres between the filter system and the water, and the transformer must also be at least 2 metres away. Without a UVC, the filter can be next to the pond, but the transformer still needs that separation. Follow the pump and UVC instructions too, and use a qualified electrician where electrical installation work is needed.
Starting up and setting the sensor
Follow the manual’s start-up sequence, check that the waste valve is shut and that the normal return is open. Let the pump fill the system and watch the distributor, screen, foams and return. Check for leaks, uneven flow and water backing up before leaving it running unattended.
The controller position depends on the flow and where waste builds up on the screen. Oase calls for a short running-in period of 2–3 hours before fine adjustment. Use the instructions for your model and watch the maximum water-jet mark. Moving the sensor until the belt runs constantly can hide an excessive-flow or dirty-screen problem.
The biological filter takes much longer to mature than this initial flow check. Test ammonia and nitrite during start-up, after major cleaning or media replacement, and when feeding increases. A bacterial starter may help establish the filter, but it does not make a heavily stocked new system instantly ready.
Upgrading an older pond filter
A new filter can make a big difference to the way a pond is looked after, but it cannot draw out every pile of sludge already sitting on the bottom. Before choosing the box, look at the pond, the pump position and what has been collecting in areas with little circulation.
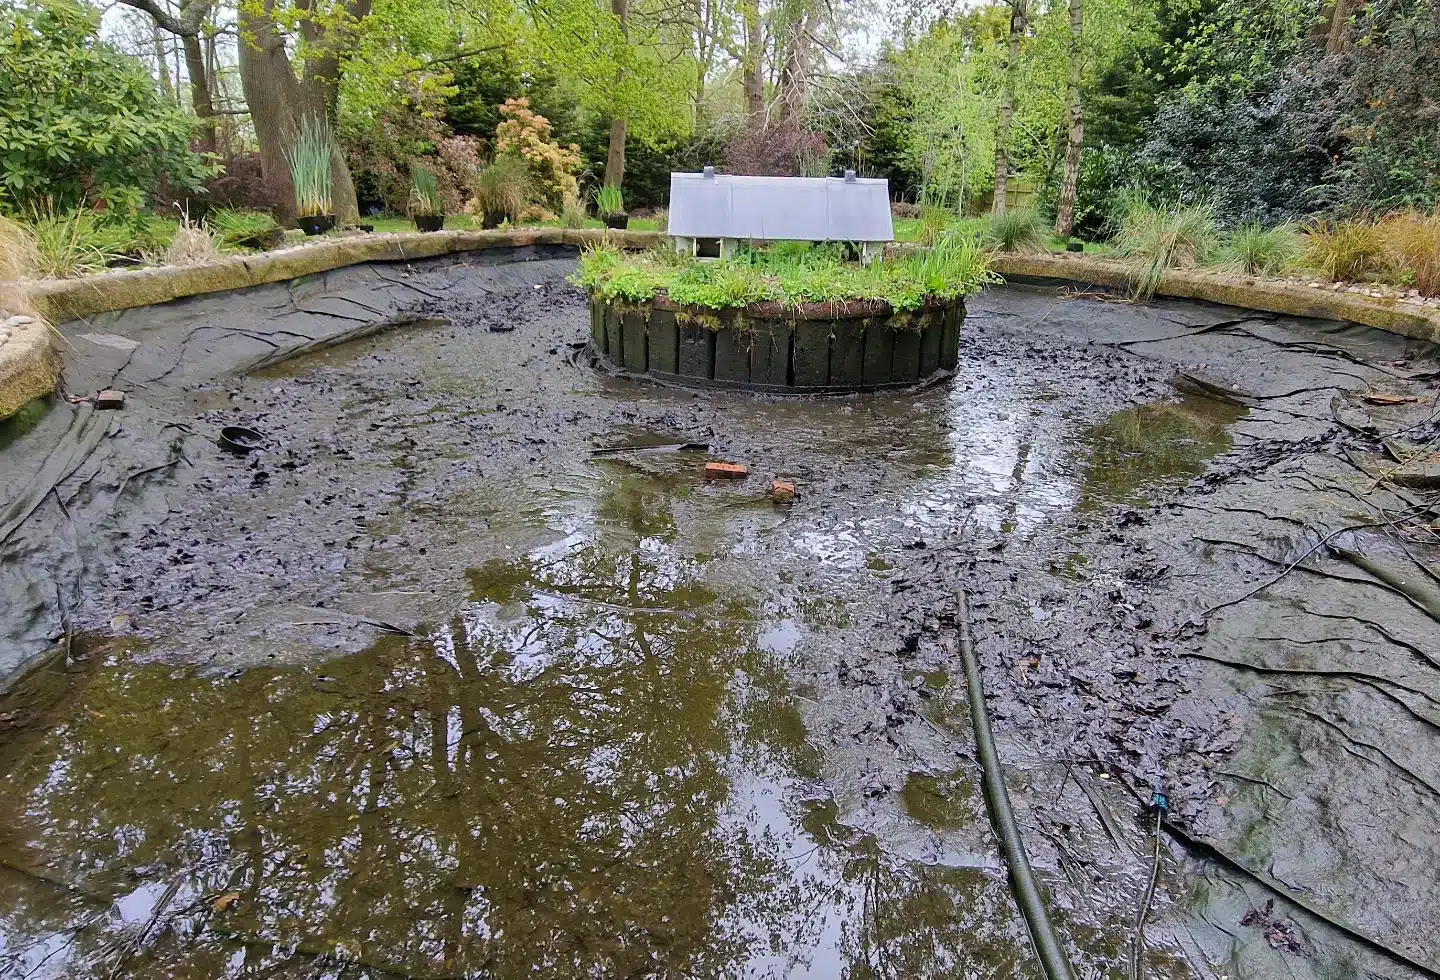
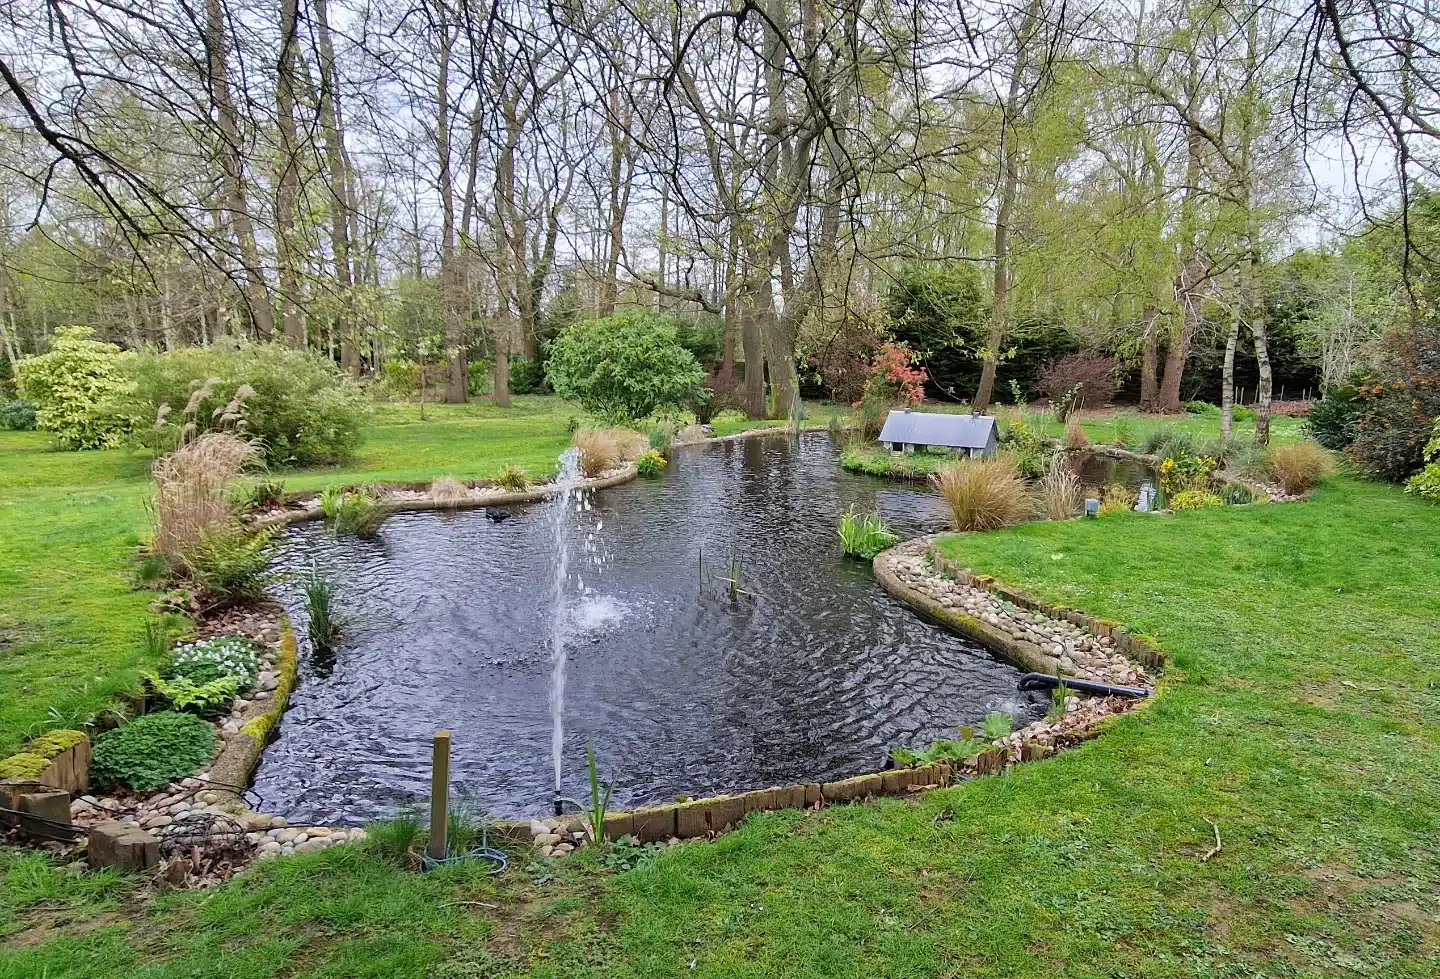
On the pond shown below, our work included a full clean and a ScreenMatic 145000 with a Bitron Eco 240 W to help the existing filtration. The photographs show the pond during that clean and filled again. They explain why we sometimes recommend cleaning and a filtration upgrade together, rather than expecting new equipment to remove years of settled waste on its own.
Keep the established biology in mind
Replacing an old filter can remove a lot of the pond’s established bacteria at once. Where the layout allows, plan a period with the old and new filtration running together while the new foams mature. If that is not practical, plan the change carefully and monitor the pond closely. New foams and a bacterial starter do not let you carry on feeding a heavy fish load without checking the water.
Test ammonia and nitrite, keep aeration reliable and adjust feeding while the new system settles. Do not use an automatic feeder’s old settings as proof that the new filter is ready. Fish still eating enthusiastically and water looking clear are useful observations, but neither replaces a water test.
Check what caused the old system to struggle
If leaves and waste are sitting far from the pump, simply fitting a larger filter may leave that collection problem unchanged. If the old return was too narrow or kept blocking, deal with the pipework during the upgrade. We also check whether the fish have grown, feeding has increased or cleaning has become too difficult. That helps avoid buying a bigger version of the same problem.
For a pond with a substantial build-up of waste, our pond cleaning service may be part of the work. It does not mean every filter upgrade needs the pond draining: the condition of the pond and how the work can be done safely decide that.
ScreenMatic or a drum filter?
A ScreenMatic makes sense when you are happy to empty the debris tray and clean the foams as part of normal pond care. The belt removes coarse waste automatically, but the rest of that cleaning routine remains yours. Its pump-fed layout also suits many existing ponds where a bottom-drain rebuild is not planned.
A drum system is worth comparing when you want finer mechanical screening and automatic rinsing, especially on a heavily fed koi pond. It needs a suitable waste route and rinse arrangement, and you still need enough biological filtration. Some drums are combined with a biological chamber; others need a separate one. Pump-fed drum options exist too, so the choice is not simply “ScreenMatic for pump-fed, drum for gravity-fed”.
Compare the whole installed system and the maintenance you are willing to do. Our drum filter guide shows the different layouts and real installations if you are weighing up those options.
How to clean a ScreenMatic filter
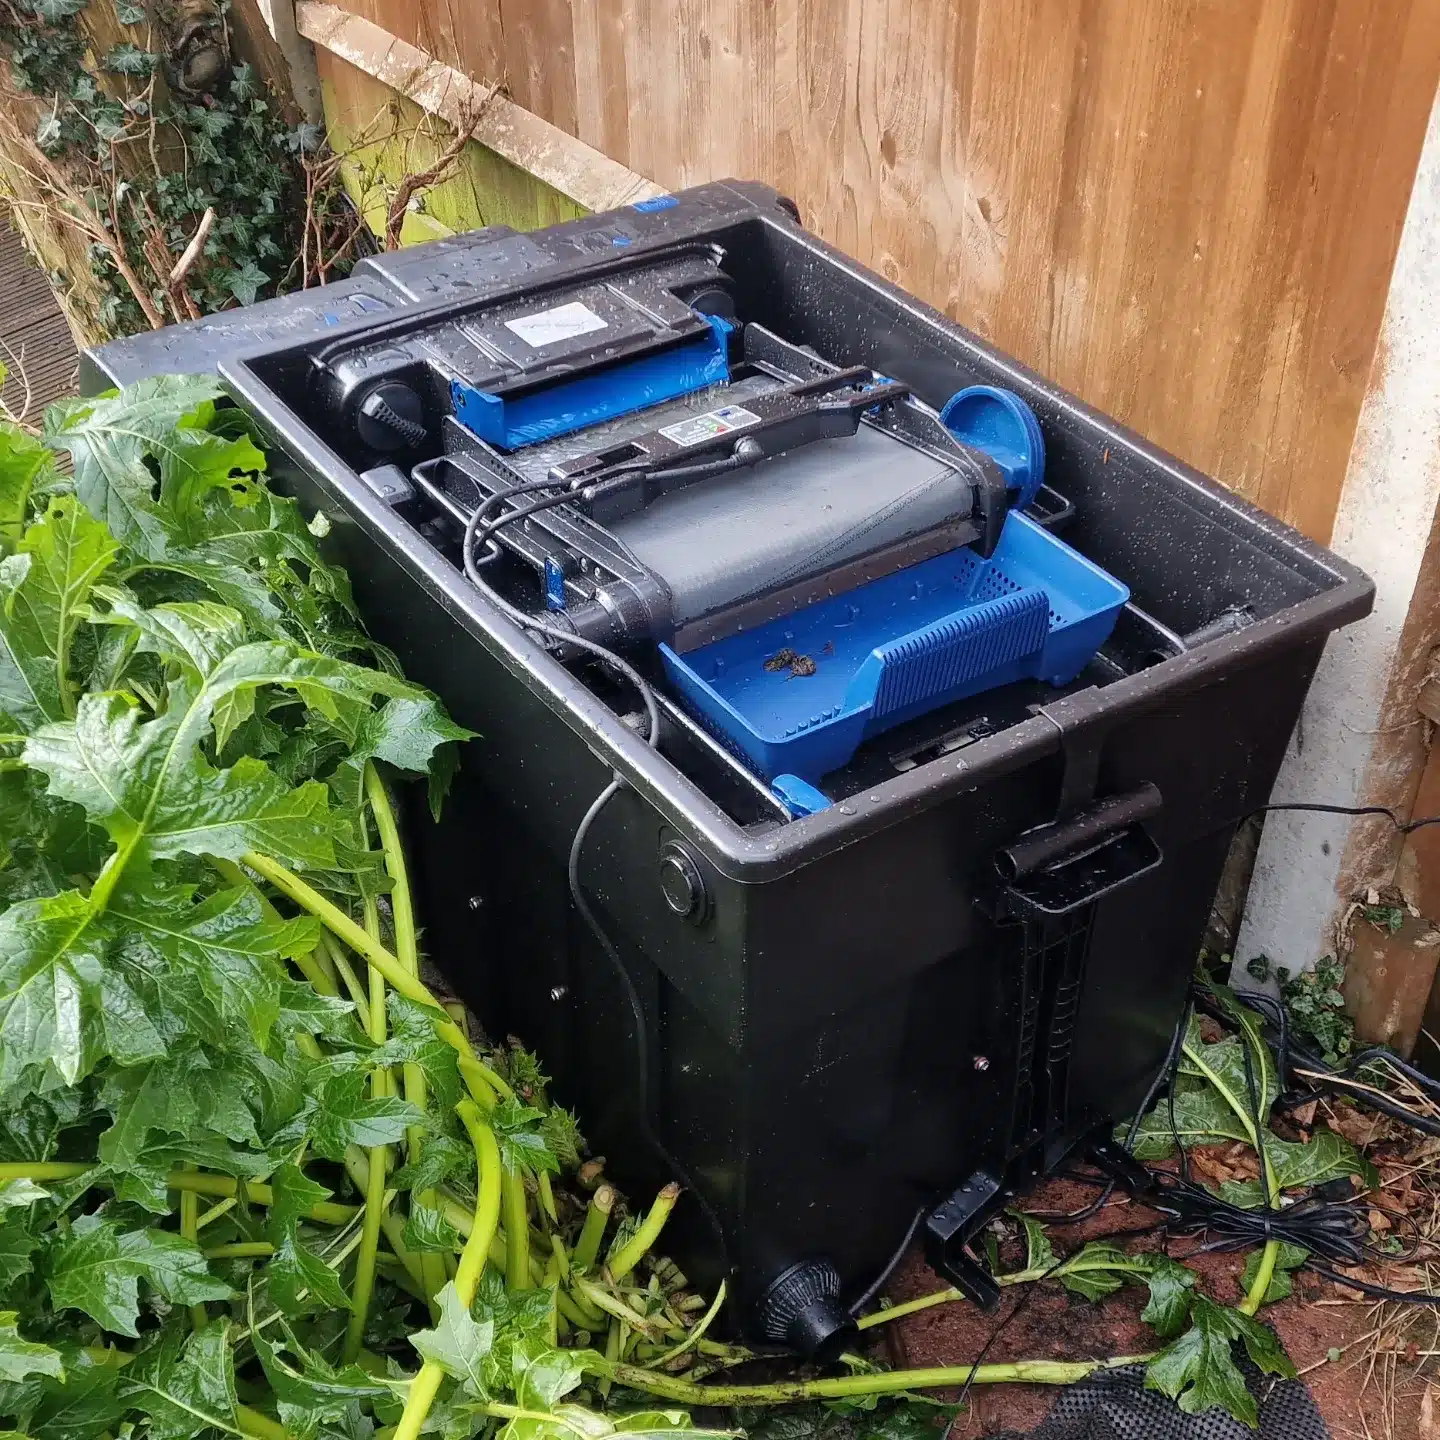
The automatic screen reduces the amount of coarse waste reaching the foams. You still need to empty the tray, inspect the screen and sensor, clean the foams when needed and service the pump and UVC. Start with regular checks, then adjust the cleaning routine to the waste your own pond produces. A fixed “once a month” rule does not suit every pond.
| Part | What tells you it needs attention? | What to do |
|---|---|---|
| Debris tray | Waste collecting in the tray; more leaves or feeding than usual | Empty it before waste accumulates excessively. Check more often during heavy leaf fall or when cleaning a dirty pond. |
| Screen and sensor | Water spreading too far along the screen, repeated cycles or visible deposits | Check flow and controller position, then clean the screen and sensor using the model instructions. |
| Foams | Water rises above the 100% mark on the separating plate | Clean using the foam-cleaning tool and waste drain. Keep dirty water out of the normal return. |
| Pump and inlet hose | Less water arrives despite the normal pump setting | Isolate power, check the pump intake and inspect the hose for obstruction or kinks. |
| UVC, if fitted | Green water persists, lamp has reached its service interval, or sleeve is dirty | Follow the specific UVC manual for lamp replacement, sleeve cleaning and safe reassembly. |
Emptying the tray and looking after the screen
Remove the debris tray carefully and empty it. Check that waste is being carried into it rather than building up around the scraper. During leaf fall, algae treatment or the first days after a filtration upgrade, the tray may need much more frequent attention than usual.
If the mesh becomes coated or blocked, follow the ScreenMatic cleaning procedure. For a deeper clean, the screen assembly can be removed and the controller position marked before disassembly. Clean both sides of the screen and the scraper, then reassemble it correctly. Oase specifies suitable cleaning products for stubborn deposits; keep these away from the biological foams and rinse cleaned parts as instructed.
Do not pull a powered belt, force a jammed mechanism or apply oil to it as a routine fix. Isolate equipment before working on it and check the manual for the actual fault. Damaged screens, cables, controllers and drives need the correct repair or replacement.
Cleaning the foams without sending dirt back to the pond
Oase uses the 100% water-level mark on the separating plate as the cleaning indicator. When the water rises beyond it, the foams need attention. The controller LED reports screen-system conditions; it is not a substitute for checking the foam water level.
- Follow the electrical isolation and opening instructions. Remove the tray and hinge up the screen holder as directed for your model.
- Fit the supplied plug to close the normal outlet. This keeps dirty cleaning water from returning to the pond.
- Following the manual’s controlled filling sequence, fill until the foams are covered, then switch the filter pump off before using the cleaning tool.
- Compress the foams with the supplied tool and drain the loosened waste through the dirt outlet. Repeat the filling, cleaning and draining stages as needed.
- Remove the normal-outlet plug, shut the waste valve, refit the screen assembly and tray, and restore normal running. Watch the return and check for leaks before leaving.
Use pond water for rinsing biological media where rinsing is needed. Avoid disinfectants, detergents and untreated chlorinated tap water on the foams. The aim is to remove accumulated muck while retaining the bacteria, rather than making every surface look brand new.
Before walking away after cleaning: check that the waste valve is closed, the normal outlet plug is removed and water is returning to the pond. These simple checks prevent a cleaning job becoming a water-loss or overflow problem.
Replacement foams and substrate tubes
Replace damaged or worn foams with the correct parts for the model, keeping the intended arrangement of colours. Oase advises replacing no more than half the foams at one time, with at least a week between partial replacements. This helps retain established biological filtration. Continue checking the water and feeding cautiously after a substantial change.
The substrate tubes are supplied with zeolite. Oase suggests replacing the contents with PhosLess once the filter bacteria are established. This is an optional phosphate-management step, rather than something to add automatically whenever the pond looks green. Investigate the cause first and follow the product instructions.
For spare parts, check the model plate and the relevant Oase parts diagram. The 40000 and 60000 share a footprint but do not use identical-sized foams, and the 90000 and 145000 also have different arrangements. A similar-looking sponge is not enough to confirm a fit.
ScreenMatic problems: what should you check first?
Look at the water as well as the light on the controller. Note whether the pump is running, whether water is arriving evenly, where it sits on the screen and whether the return is clear. That gives a much better starting point than buying a new motor because the belt appears still.
| What you see | Possible causes | First checks |
|---|---|---|
| Belt stays still | Little waste, timer between cycles, missing power or a drive problem | Check normal water flow and controller state. Use the manual cleaning control as instructed; if it fails, isolate power before checking accessible connections. |
| Frequent belt cycles or flashing red | Dirty mesh or sensor, poorly positioned controller, or too much flow | Inspect the screen and sensor, check controller position and compare delivered flow with the model limit. |
| Alternating green/red | No sensor-triggered automatic cycle for 48 hours on the controller described in the manual | Check pump flow, sensor cleanliness and position. Low soiling can also mean no demand-triggered clean was needed; read the model fault table. |
| Water rises in the foam section | Foams need cleaning or the return is restricted | Compare the level with the 100% mark, inspect the return and carry out the proper foam clean if needed. |
| Pond water remains green | UVC missing, wrongly sized, worn lamp, dirty sleeve or unsuitable flow | Check the separate UVC and its service instructions, as well as the system flow. |
| Water is clear but ammonia or nitrite is raised | Biological filter not mature, waste load exceeds capacity, disrupted filtration or excessive feeding | Reduce feeding while investigating, check aeration and water tests, and get advice on the pond and filtration. A clear-looking pond is not proof of safe water. |
Should the belt move all the time?
No. It moves in cleaning cycles. Besides sensor-triggered cleaning, the controller described in Oase’s current manual runs timed cycles according to ambient temperature: roughly every 6 hours at or below 10°C, every 4 hours between 10°C and 20°C, and every 3 hours at or above 20°C. These are controller conditions, not koi feeding temperatures.
A still belt during a quiet period can therefore be normal. A screen overflowing, a jammed belt or a manual cycle that will not run needs investigation. Check the manual for your controller generation rather than applying one LED explanation to every older ScreenMatic.
Why is water bypassing the screen or backing up?
Check for a blocked mesh, incorrectly seated components, excessive incoming flow and a restricted outlet. Make sure the filter is level. If water is escaping and the pond level is falling, stop the water loss safely before investigating; do not leave the pump running while hoping the belt will clear it.
Removing foams or altering the filter to gain more flow changes how it works. Find the restriction and correct the installation instead. If the pond needs a much higher flow or more biological capacity, review the system rather than expecting this filter to cope beyond its design.
Can you leave a ScreenMatic running in winter?
That depends on protection from frost, the water temperature and the rest of the pond system. A heated pond does not automatically keep an exposed filter, waste valve or return pipe frost-free.
For a frost-protected installation, such as suitable enclosed housing, Oase permits operation while water remains at least 4°C. For an unprotected outdoor installation, its manual says to shut down below 8°C water temperature, or at the latest when freezing temperatures are expected. Drain remaining water from the filter, hoses, pipes and connections, leave drain valves open as instructed and prevent rain refilling the container.
Plan this before cold weather arrives. A stocked pond still needs suitable aeration and water-quality management when its main filter is stopped. If you want year-round filtration, arrange a properly protected system and review the winter return route. Our pond heating guide explains covers, insulation and heating choices; our aeration guide covers the separate oxygen supply.
What does a ScreenMatic cost to run?
Oase lists 5 W for the ScreenMatic² control system. That is not the running cost of the whole installation. Add the pond pump, UVC, any air pump and any heating you use. The pump setting and actual equipment supplied in a set matter much more than quoting the filter’s small wattage on its own.
For example, equipment drawing 200 W continuously would use 4.8 kWh in 24 hours. At an illustrative tariff of 25 p per kWh, that is £1.20 a day. Use your own tariff and the power drawn by your equipment to calculate your installation’s cost.
Also budget for UV lamps, cleaning products where needed and worn parts. Check the separate warranty terms for the filter, pump and UVC, including any registration needed for an extension and exclusions for consumable parts. A set does not automatically give every component the same warranty.
Getting the right filter for your pond
The ScreenMatic is worth considering when you have room for a flow-through filter, a suitable gravity return and want coarse waste removed automatically before the foams. The tray and foams remain part of the owner’s cleaning routine. For a pond where the filter must sit below the return point, a suitable pressure-filter arrangement may make more sense.
We can help match a ScreenMatic to an existing pond or plan it as part of a filtration upgrade. Send us the pond volume, fish types and approximate sizes, current equipment, height to the proposed filter position and photographs of the return route. Those details let us give useful advice without guessing from the model number.
Browse our ScreenMatic filters and sets, or contact us about your installation. We also provide pond maintenance and pond cleaning for owners who want help keeping the whole pond in good condition.
Oase specifications and instructions
For the manufacturer’s ratings, downloads and parts diagrams, use Oase’s pages for the 40000, 60000, 90000 and 145000. Download the instructions for your exact filter and follow the separate pump and UVC manuals too. Specifications reviewed 15 October 2026.
