







How to Plant Pond Plants in Baskets: Compost, Gravel and Depth
Pond plant baskets: measure the shelf and check the depth
Before you buy a basket, measure the shelf where the plant will stand. Then check the plant label. A basket can fit neatly on a ledge and still leave the plant much too deep once the pond is full.
We clean and plant ponds as well as supplying pond plants, so the planting needs to work when it is time to lift a basket out again. Room for roots matters. So do a stable base, a sensible lifting position and enough space around the planting to maintain the pond.
Our starting point: choose the plant for the place, then choose a basket that fits both. Check whether it needs repotting, use a growing material suited to that plant, and measure its position at the pond’s normal water level. Buying the biggest basket you can find does not answer all of those questions.
Does this plant actually need a basket?
A basket is useful when you want to keep a rooted plant in one place and be able to move or divide it later. It is especially convenient in a lined garden pond where you do not want planting material spread across the bottom. It is not the right answer for every aquatic plant.
The RHS describes hornwort as a free-floating plant. Willow moss can be attached to a stone. Neither needs the same treatment as a rooted marginal. Our oxygenating-plant guide explains the differences in more detail.
| What you have | What to check first | Useful next step |
|---|---|---|
| A rooted marginal | The labelled water depth, eventual size and type of pot supplied | Choose a stable basket and a shelf that puts the plant at the right depth |
| A water lily | The cultivar, its depth range and the room available for its leaves | Use our water-lily planting advice |
| A submerged oxygenator | The actual species, rather than the general word oxygenator | Check whether it floats, attaches to a support or needs planting |
| Planting for wildlife | The purpose of the pond and whether planting is needed | Keep habitat and access in mind; see our wildlife-pond guide |
There is also a difference between a planted garden pond and a new pond created mainly for wildlife. The Freshwater Habitats Trust explains that a clean-water pond can be left to colonise naturally. You do not have to buy a collection of plants just to make a wildlife pond look finished immediately.
Check the pot before you repot anything
Some pond plants arrive ready planted in an aquatic basket. Others arrive in a nursery pot. Look at what has been supplied before taking it apart.
For an aquatic plant supplied in a one-litre or three-litre mesh basket, check whether that basket can go straight into its intended position. A small solid nine-centimetre nursery pot is different: a plant intended to grow in the pond will normally need repotting into a suitable mesh basket. Pondside plants still need the soil conditions on their own label, rather than automatic submersion.
If a healthy plant is already in a suitable basket, there may be no reason to disturb it straight away. Check whether the basket fits its intended position and gives it sensible room for growth. Keep the label, even if you take it off the handle, so the plant name and depth advice are not lost.
When buying several plants, make a short list with a position against each one. It is much easier to spot a missing shallow shelf on paper than after all the plants have arrived.
Choose a basket that fits the shelf
Check width, length and height, not just capacity. A litre figure tells you about the container’s volume. It does not tell you whether the base will stand securely on a narrow ledge or how high the crown will sit above it.
A useful example is a two-litre round basket measuring 17cm across and 13cm high, compared with a two-litre square basket measuring 19 × 19cm and 9cm high. The same capacity can give you a different footprint and planting height. Check the dimensions of the exact basket you are buying.
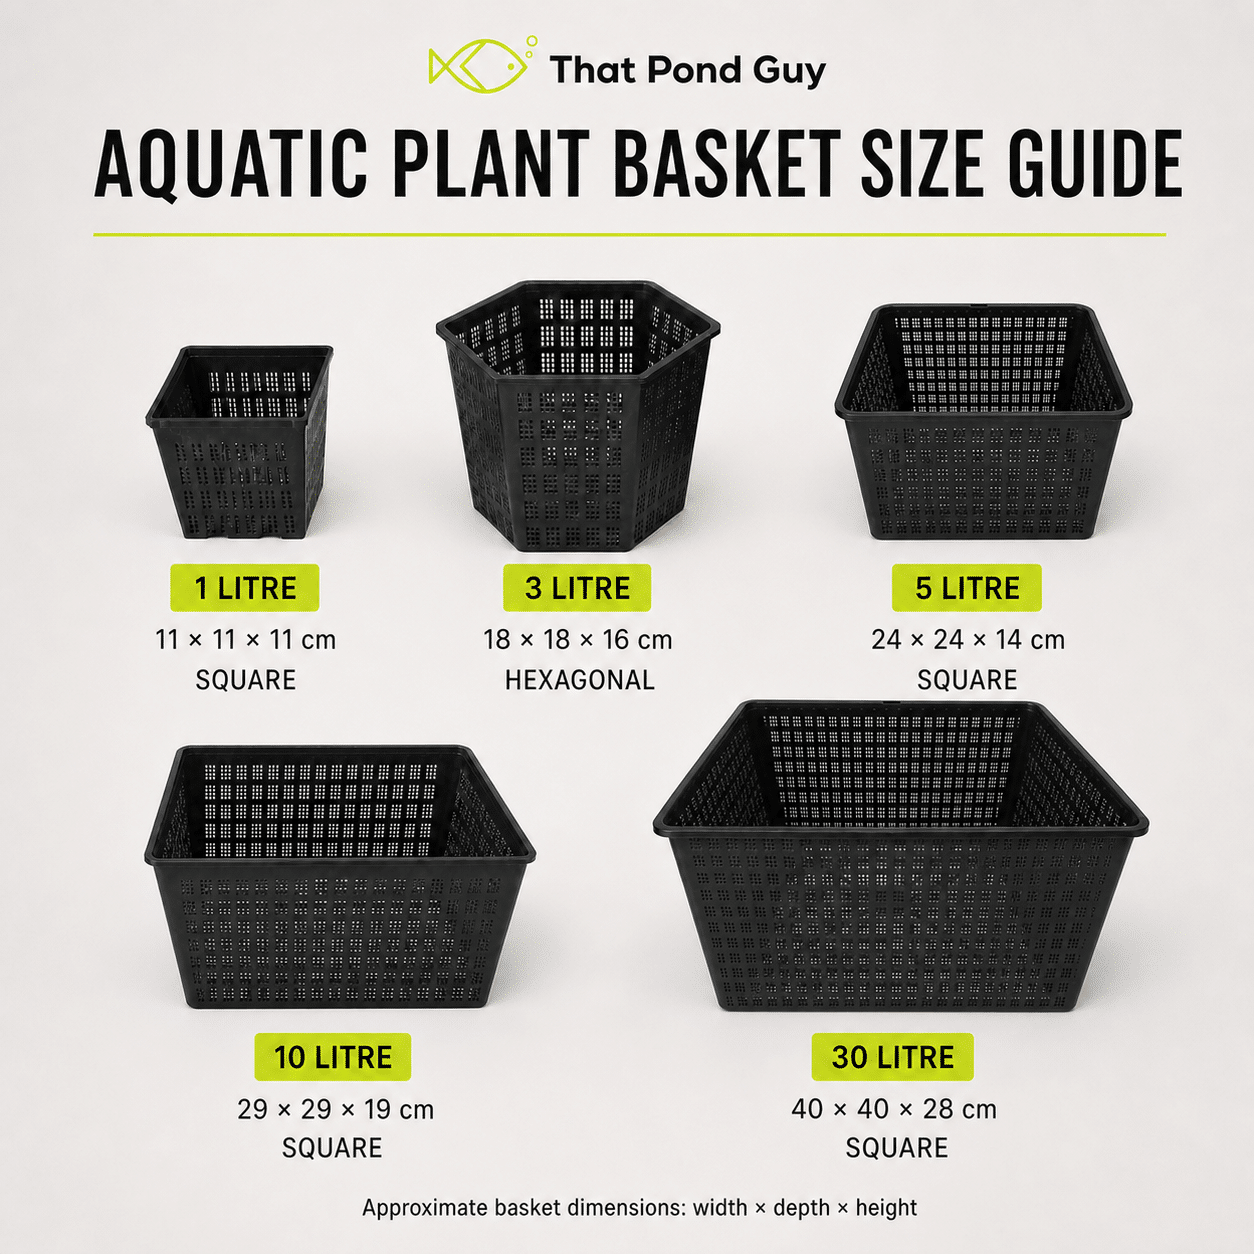
You can browse our pond plant baskets here. Compare the actual dimensions with the shelf and the plant you are buying. Allow space to get your hands around the basket later, rather than filling every spare centimetre of the ledge.
A bigger basket holds more wet growing material. Think about its weight once the plant has grown, too. If you can only reach it by leaning a long way over the pond, that is a reason to reconsider the position before planting.

Do aquatic baskets need hessian?
Some do; some are made to work without it. The purpose of a liner is to keep fine growing material from escaping through an open mesh while allowing water through.
A fine-mesh basket may hold the growing material without a separate liner. With a more open basket, a suitable liner may help. Check the mesh and the basket instructions rather than treating a liner as an automatic extra.
The RHS planting guidance makes the same distinction between fine mesh and baskets that need lining. It also recommends a suitable medium-to-heavy loam or aquatic compost, with a surface dressing to help keep the material in place.
A basket with a broken side or a poor fit on the shelf needs attention first. A liner will not make an unstable basket stable. We would also check that there is enough room for the plant before going to the trouble of lining a container it will soon outgrow.
Aquatic compost, garden soil or gravel?
Choose the growing material for the plant and the planting method. Ordinary multipurpose potting compost is not a direct substitute for a pond planting mix. Garden soil also needs checking: the RHS specifies suitable loam without fertiliser or herbicide contamination, rather than any soil dug out of a flower bed.
Do not assume that aquatic compost contains no nutrients at all. Westland’s aquatic planting mix, for example, uses loam, grit and controlled nutrients. The important point is that the material is formulated for aquatic planting.
Gravel can be a surface dressing, a planting material in a suitable system, or a way to hold a particular plant in place. Those are different uses. A layer of stones over a water-lily basket does not mean the lily has been planted in gravel alone.
If you are changing from a compost-based planting method to a mineral substrate, check how that plant will be supported and fed. Follow the plant and substrate instructions together. We would not make that change simply because one bag looks cleaner to handle than another.
Eheim’s pond guide, on its planting page, describes a mineral-substrate approach. Check the bag before you use it. A mineral planting medium and a loam-based aquatic compost can need different handling.
Planting a rooted marginal in a basket
Get everything ready beside the pond before lifting the plant out of its existing container. A filled basket can be awkward to carry, and you do not want to be looking for the label or topping material with wet hands and a plant waiting on the ground.
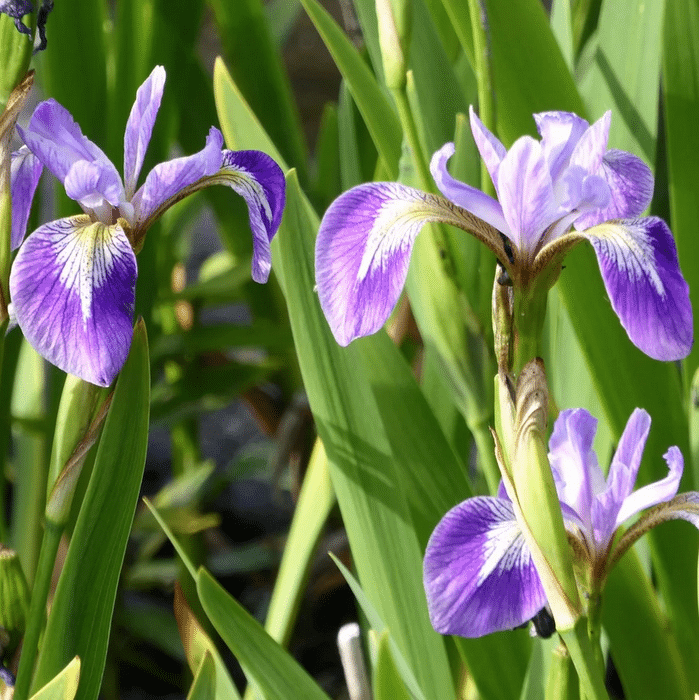
- Read the label. Confirm the plant’s position, depth and growing material. Decide where the finished basket will stand.
- Check the empty basket. Make sure its base fits the shelf and it sits securely. Fit a suitable liner if that particular mesh needs one.
- Prepare the growing material. Follow its instructions. Leave room for the plant and the surface dressing rather than filling the basket to the top at the start.
- Position the plant. Keep the growing point at the depth its instructions specify. Do not hide the crown under a mound of compost or stones simply to make the basket look tidy.
- Finish the surface. Add the appropriate dressing without covering the growing point. Make sure the plant is held firmly.
- Place it carefully. Check the finished position against the normal water level, then keep the label with your planting notes.
Use this sequence to organise the job, then follow the instructions for the plant in front of you. A rhizome, a bare-root plant and an established potted specimen can need different handling. If you cannot identify the plant, sort that out before cutting roots or changing its depth.
Keep tools and bags back from the edge, and avoid balancing a heavy basket on a narrow coping stone while you work. Eheim specifically advises preparing larger planted containers close to the pond because of their weight. Plan the lift as carefully as the planting.
Measure the water above the plant
The depth of the shelf is not necessarily the planting depth. Find out where the plant supplier takes the measurement from. It may be the crown or the planting surface; do not assume it is the bottom of the container.
For example, imagine that your shelf is 35cm below the pond’s normal surface. The planting point sits 20cm above the basket base. There will be 15cm of water above that point.
| Measurement | Example | What it tells you |
|---|---|---|
| Surface to shelf | 35cm | Where the basket base will stand |
| Base to planting point | 20cm | How high the plant sits above the shelf |
| Water above the planting point | 35 − 20 = 15cm | The figure to compare with instructions using that point |
| With a 10cm support | 35 − 20 − 10 = 5cm | How raising the basket changes the water above it |
These figures only show the calculation. They are not a recommended depth for every marginal or lily. Use your own measurements and the particular plant’s depth range.
Measure again if you change basket height, add a support or move the plant to another shelf. Those changes can alter the water above the crown without changing the pond’s overall depth.
Any support needs to be stable and suitable for the liner beneath it. The RHS pond-construction guidance suggests protecting the liner where bricks are used to raise containers. Do not solve a depth problem by creating an unstable pile beneath a heavy basket.
Water lilies in koi ponds: our approach
With supplied three-litre water lilies, we normally move them into a larger basket. In koi ponds, we use washed gravel of roughly 20mm over the planting to discourage the fish from rummaging through it. That is our approach for that situation; the basket, plant and fish still need considering together.
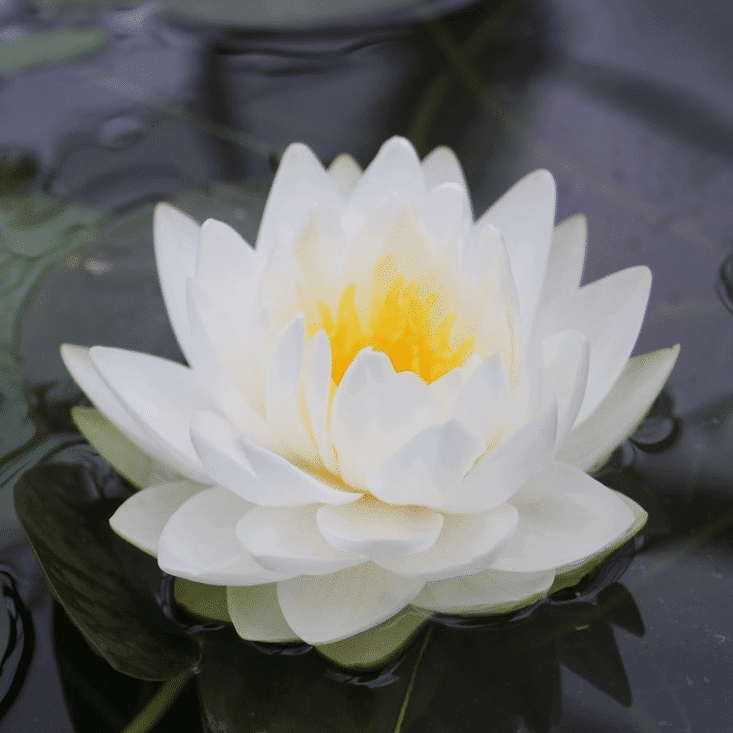
Leave room for the lily rather than packing a basket with several unrelated plants. Think about where its leaves will spread, how you will reach the container and whether koi can get at the planting.
The RHS water-lily guide gives five to ten litres as a usual basket size for many lilies, with smaller containers for dwarf types. It also explains placing a young lily in shallower water initially and lowering it as it develops. The variety’s own requirements matter more than a general label saying water lily.
Our full lily guide covers planting depth, flowering, feeding and choosing a variety. Keep those details with the plant rather than trying to remember one depth for everything in the pond.

How do you stop koi disturbing the plants?
We generally use washed gravel of roughly 20mm over the planting where koi or carp are likely to rummage. We find it harder for them to suck up and spit around than fine grit or small shingle. It also makes it more difficult for a fish to push its head into the basket looking for food around the roots or growing material. Keep the growing point clear when finishing the surface.
Every pond is different, and so are the fish. Look at what yours actually do: shifting the topping, pulling new shoots and uprooting the whole plant are different problems.
In our experience, the first growing season can be the hardest. Young plants are more easily disturbed, and a plant that is repeatedly pulled about may make little progress that year. As a planting establishes, we often find it grows more strongly and copes better with the fish. That takes time; if a plant is continually being uprooted, give it more protection rather than assuming it will eventually manage.
Where gravel is not enough, consider a separate planted area or a suitable barrier that keeps the fish away from the roots and new shoots. Plan access for lifting baskets and inspecting the barrier before filling the shelf. A protected bed that can only be reached by dismantling the surround will be awkward to maintain.
Our guide to plants for koi ponds covers the wider plant choices and arrangements. Choose the protection around the plant, its growth and the behaviour of your own fish.
What if a basket floats, tips or clouds the water?
Lift it out and check what is happening before adding more weight. The first question is whether the basket is actually unstable, the growing material is escaping, or the fish are disturbing a properly placed container.
| What you notice | What to check | A useful next step |
|---|---|---|
| The basket will not settle properly | Preparation of the growing material and the plant’s intended planting method | Prepare it as instructed and lower it carefully; do not force it down with an unsuitable load |
| A tall plant tips | Basket footprint, the ledge and how firmly it is planted | Reconsider the base and position before adding a support or ballast |
| Soil keeps escaping | Mesh, any liner, damaged sides and surface dressing | Correct the container or planting rather than continually covering the escaped soil |
| The crown is under too much water | The supplier’s measuring point and the finished water level | Recalculate the position using the plant label |
| Koi pull at the planting | Access to roots and shoots, as well as the topping | Consider a protected planting area |
Westland’s aquatic-compost advice recommends dampening the mix and using a grit topping to reduce dispersal during placement. Some disturbed material does not automatically mean that the whole planting method is wrong, but continuing soil loss needs checking.
Brown sediment after moving a basket is also a different problem from green water caused by suspended algae. If you are unsure which you are looking at, our pond-algae guide explains the distinction. Do not reach for an algae treatment simply because the water became cloudy during repotting.
Feeding, repotting and leaving healthy plants alone
A few yellow leaves do not tell you that a plant needs fertiliser. Look at the season, its light and water depth, and whether the basket is becoming crowded before deciding what to change.
Do we routinely feed pond plants?
In the fish ponds we maintain, we do not normally add plant feed. We find that many plants grow well with the nutrients already present in the pond. If a planting is thriving, feeding it is not an automatic extra job on our list.
You will also see advice to feed. The RHS water-lily guide recommends a slow-release aquatic feed in spring, pushed into the compost. A lily’s growing material, condition and available nutrients matter, so judge your own planting rather than assuming every pond needs the same feeding routine.
If you do use a feed, follow that product’s instructions and place it as directed near the roots, keeping it out of the open water. Check the cause of poor growth first, and avoid changing depth, growing material and feeding all at once: you will struggle to tell which change helped.

What makes us lift a plant for repotting?
We look for a clump that is physically growing out of its basket, with roots extending through the mesh and very compact growth. Taken together, those are useful signs that the plant is running out of room. A few roots through a mesh basket on their own are not a reason to take a healthy planting apart.
- Keep the plant whole: remove the old basket, move the clump into a larger one that still fits the shelf, and backfill around it. In our gravel-based planting approach, that means adding suitable gravel around the existing rootball to give it room to grow.
- Divide a suitable clump: a large, congested clump-forming marginal may give you several smaller plants. Sometimes that means four sections in four separate baskets. Each section needs healthy roots and growing points; do not cut every aquatic plant into quarters by default.
Water-lily rhizomes need their own approach to division. Identify the plant before cutting, and use its individual care instructions. The aim is to give viable plants growing room, rather than produce a particular number of pieces.
For general aquatic planting, spring into early summer gives many plants a useful establishment period; the species and conditions still decide the timing. A healthy basket does not need an annual repot simply because another part of the pond is being cleaned. Keep a record of its position before moving it, so it returns to the right depth. Our pond-maintenance guide covers the wider routine.
Plan the whole shelf before filling the baskets
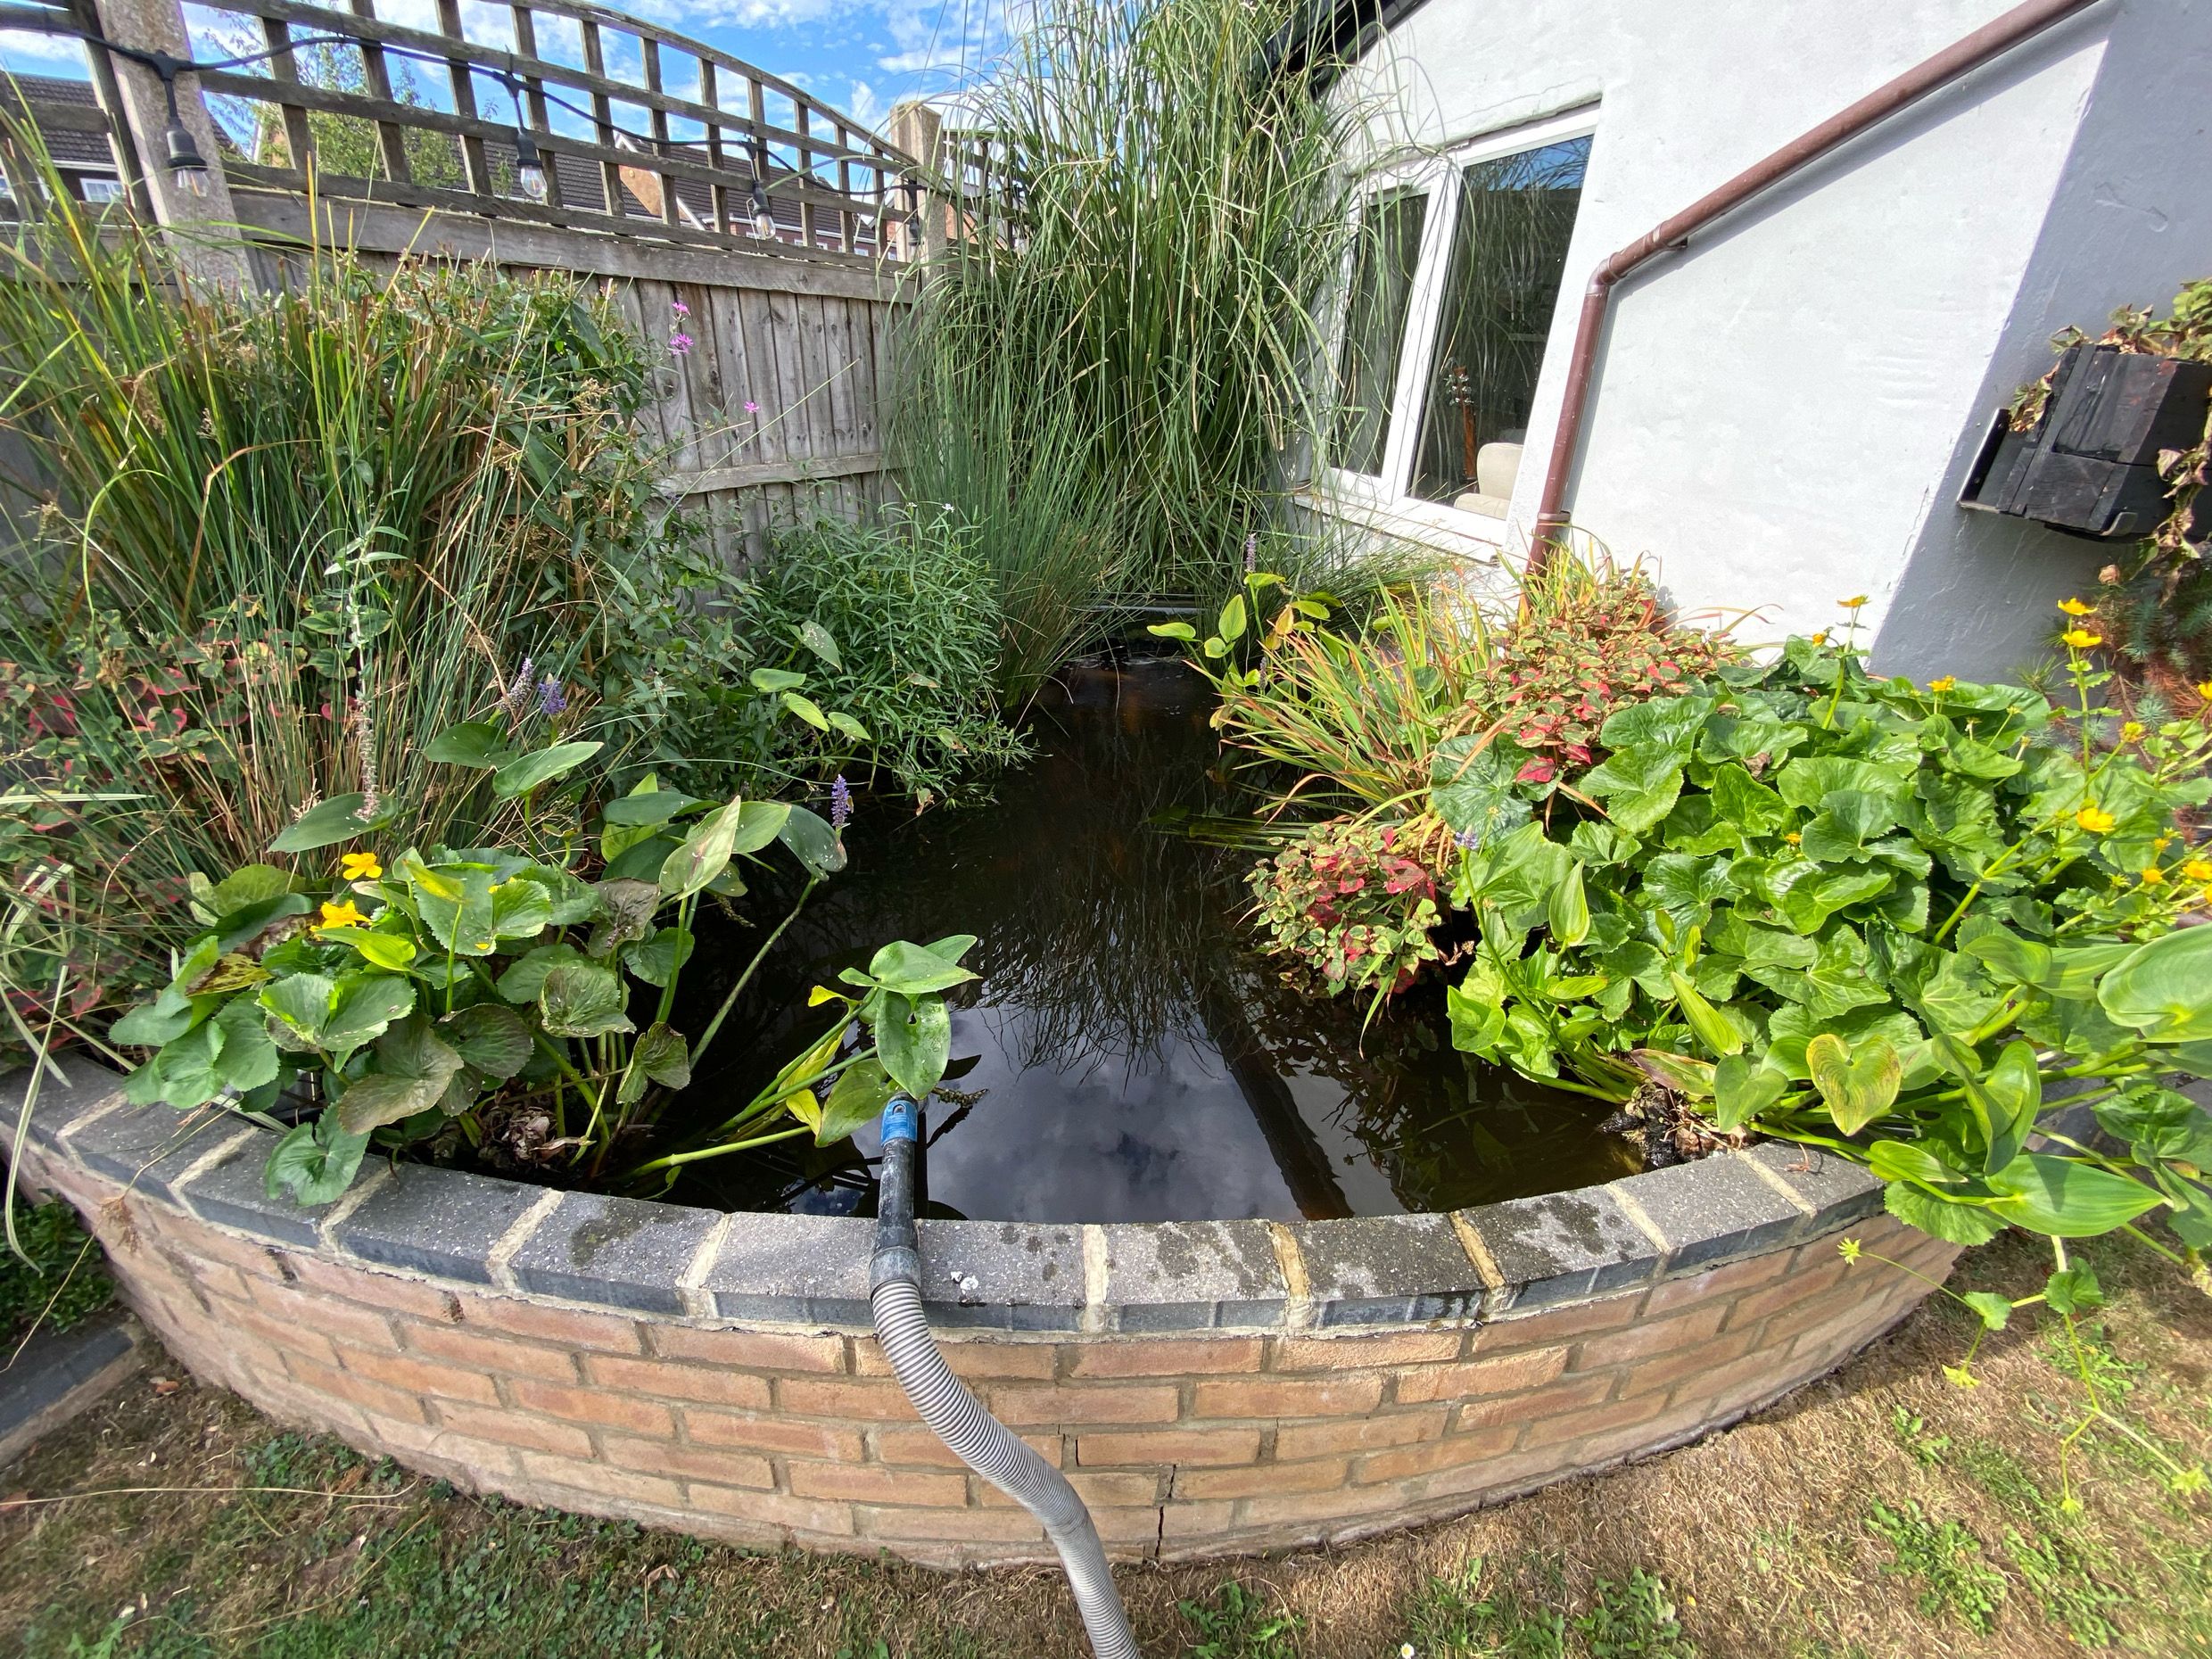
Start with a rough sketch of the pond. You need to know where each plant will stand and how you will reach it once it has grown.
- Measure the usable ledge. Check several points, including corners. A shelf can slope or narrow where its edge curves into deeper water. Measure the flat area that will support the basket, rather than counting a rounded edge where it would lean.
- Mark the equipment and water routes. Include the skimmer, pump intake and filter return. Keep those accessible. Baskets and their supports must not obstruct a return, and loose planting material should not be used to hide a pipework problem.
- Allow for mature plants. A modest nursery pot can become a large clump. Leave space to remove fallen leaves, inspect the water and lift each basket without dismantling the planting beside it. If a basket only fits with part of its base hanging over the ledge, change the position or container.
Leave room for your hands as well as the roots. Packing every centimetre of a shelf may look finished on planting day, but it makes the next maintenance visit much harder.
Ordering plants, baskets and planting materials together
Make the shopping list plant by plant. Before ordering a larger basket, find out whether the plant is supplied in a nursery pot or an aquatic basket that can already be used.
A three-litre water lily and a three-litre upright marginal do not automatically need the same next container. Compare their eventual growth, the shelf space and the intended planting method. Ask about the actual variety and supplied format if either is unclear.
| Put this on your list | Why it matters |
|---|---|
| Plant name and supplied pot or basket | Avoid buying a replacement container before checking what comes with the plant. |
| Finished position and water depth | Confirm that the plant and its proposed basket fit the same usable shelf. |
| Basket dimensions and any liner | Check footprint, height and mesh; capacity alone does not settle the choice. |
| Growing material and surface dressing | Order for the actual planting method, allowing for the existing rootball. |
A ten-litre basket does not necessarily need ten litres of fresh compost. The plant and its existing rootball already occupy space, and the surface dressing needs room too. Use bag sizes to plan the job, rather than treating the basket’s capacity as a planting recipe.
Keep the bags and plant labels until you have finished. If you need advice afterwards, a product name, a photograph and the shelf measurements are much more useful than a description of an unidentified growing mixture. Labels also help distinguish similar irises or lilies later in the season.
When your plants arrive
Open the parcel promptly. Have somewhere suitable ready for the plants while you check the order, rather than leaving them sealed up while you finish building a shelf.
- Match each plant to its label. Keep names with the plants, especially if you have ordered several similar varieties.
- Hold it in the right conditions. Follow the supplied care instructions. A shallow marginal should not be dropped into a deep holding tank, and a submerged oxygenator must not be left drying on the paving while the baskets are prepared.
- Check anything that concerns you before altering it. Photograph the plant and contact the supplier before cutting it back or taking the rootball apart.
The season matters. A plant photographed in full growth may have much less foliage when delivered in early spring. Check the supplied size and growing points, rather than expecting it to arrive looking exactly like a flowering catalogue photograph. For a spring planting job, check availability near the time and allow for weather and growth conditions.
Can different plants share one basket?
Sometimes, but separate baskets give you more flexibility. You can move one plant to a better depth, divide it or replace it without disturbing its neighbours. That is particularly useful on a narrow shelf.
If you combine plants, match their conditions and consider how quickly each will grow. A vigorous tall plant can crowd a smaller, slower one even when both are described as marginals. You still need access to the growing points and a workable plan for lifting or dividing the basket later.
A mixed plant pack is a way to choose a group of plants; it is not an instruction to squeeze them into one container. Our native wildlife marginal pack is one option for pond-edge planting. Check its current description and give each plant a suitable position.

Reusing baskets without carrying problems to another pond
You can reuse a sound basket. Empty it, clear away trapped roots and growing material, then inspect the base, rim and mesh. Replace a brittle or split container before filling it with another heavy rootball.
Take care when moving material between ponds
The RHS wildlife-pond guidance warns that water or sediment from another pond can introduce diseases or invasive plants. Avoid carrying those materials between ponds, and check plants, baskets and wet equipment before moving them.
Do not collect plants from the wild or release surplus growth into a stream, ditch or another pond. Identify an unfamiliar or suspected invasive plant and check the current disposal advice before spreading fragments around the garden.
Keep a simple planting record: name, basket size, position and planting month. A photograph from the same spot each season helps you judge whether the plant needs more room or is simply showing its normal seasonal change.
A short check before you order
Can you name the plant, give its required depth and measure the ledge where it will stand? Those three details will rule out a lot of unsuitable choices before you buy anything.
Then check the container, growing material, fish access and how you will lift the basket later. If you would like our help, send a clear pond photograph and those measurements. We can give much more useful advice from that than from the pond’s total volume alone.
