






Oase Aquafit 300 Complete Replacement Rotor — 53107
| Brand | |
|---|---|
| Product type | Complete replacement rotor |
| Manufacturer part | 53107 |
| Documented pump | Aquafit 300 |
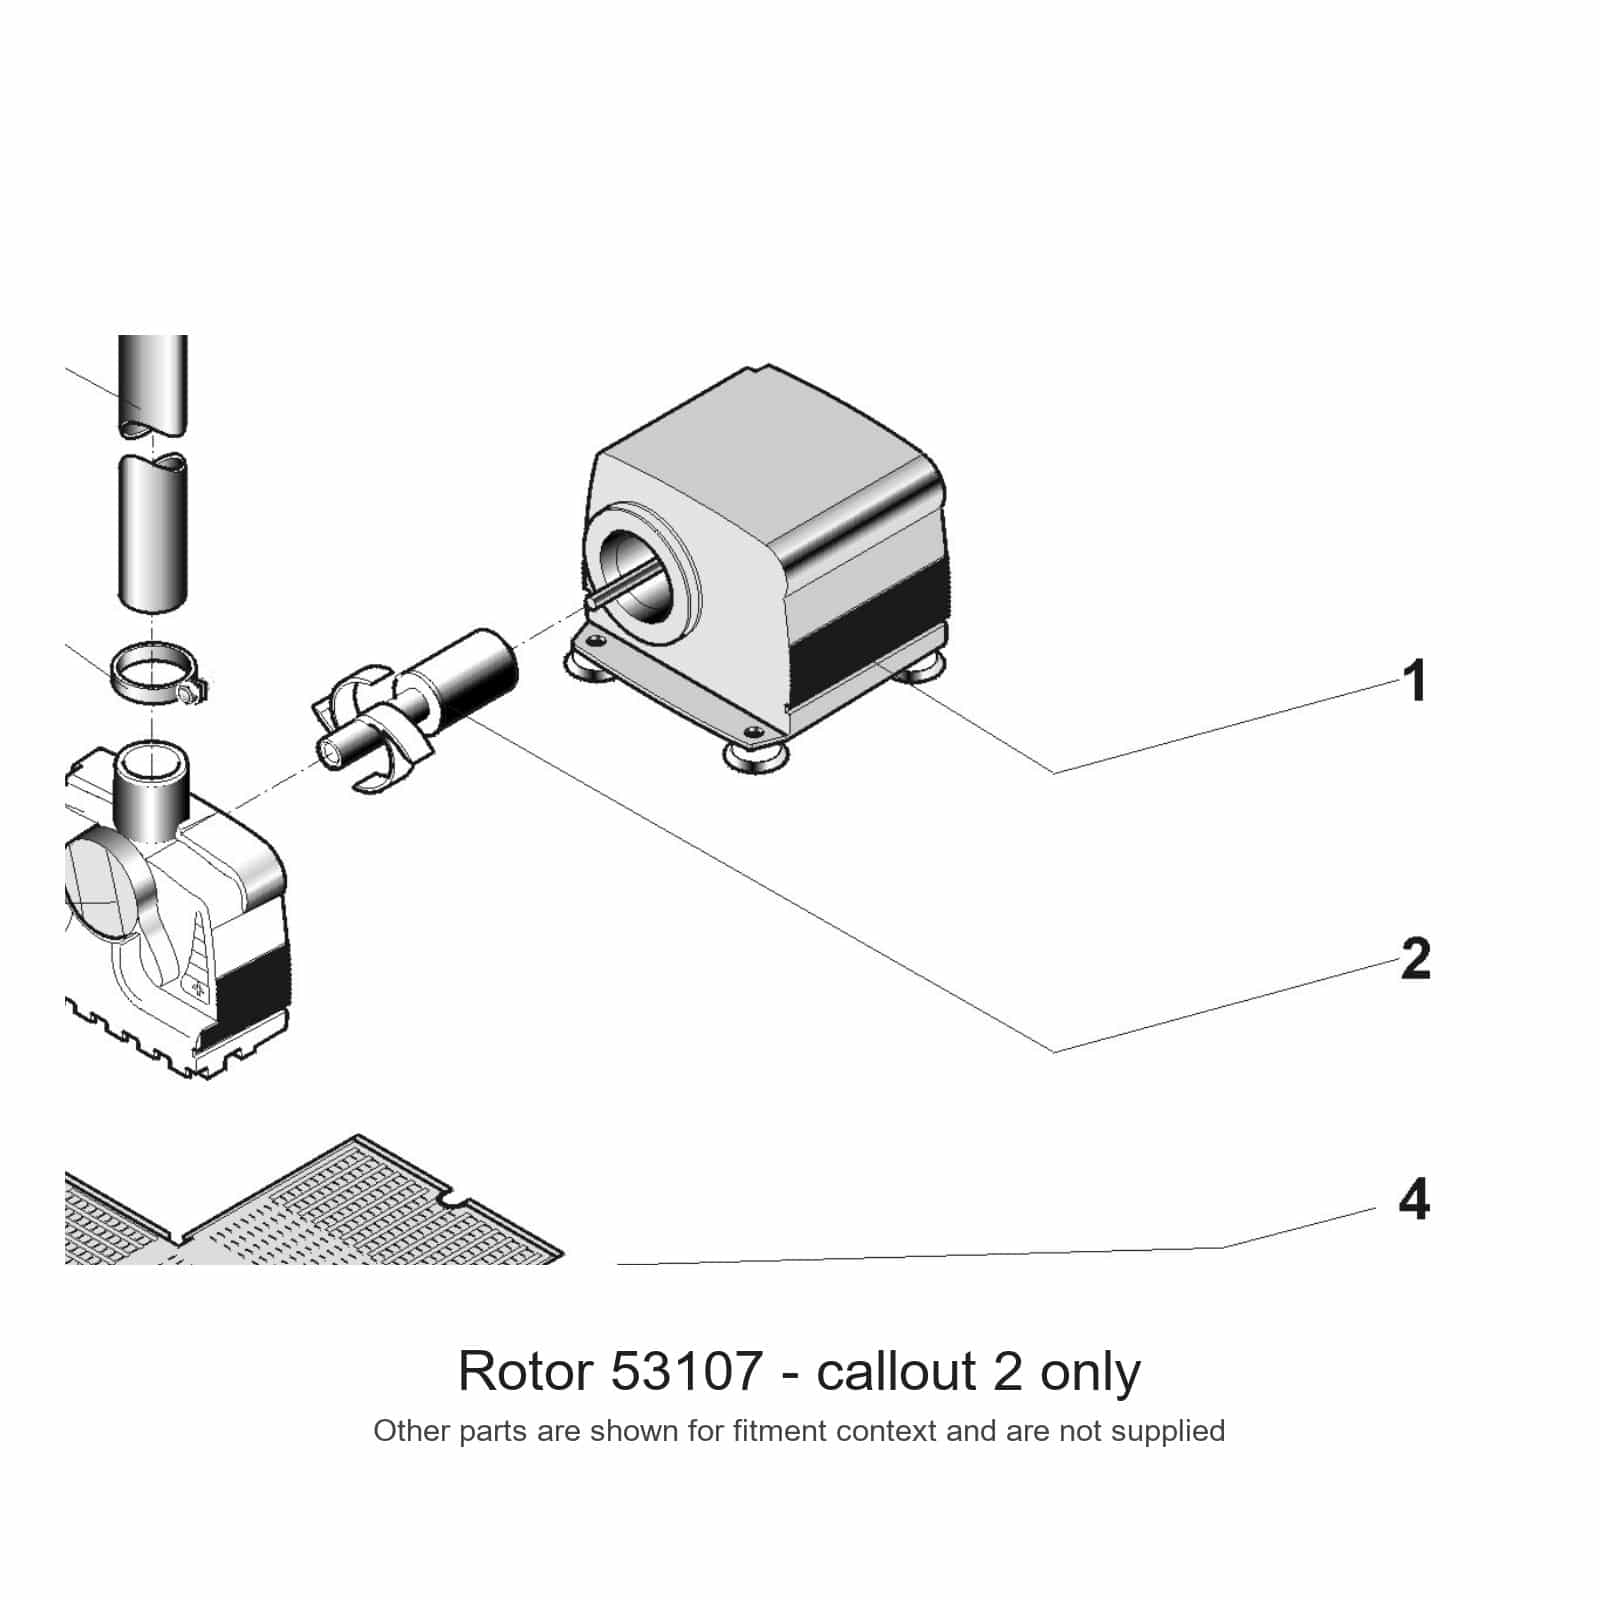
Oase replacement rotor 53107, documented for the Aquafit 300 ice-preventer pump. One rotor assembly; match the exact pump and part reference. The complete pump and other service parts are separate.
£9.96 (inc VAT)
Oase 53107 Complete Rotor for Aquafit 300
Oase part 53107 is identified in the manufacturer’s spare-parts catalogue as the complete rotor for the Aquafit 300 ice-preventer pump. Select the replacement by that exact part reference and the documented pump model. This listing supplies the rotor assembly, rather than a complete ice-preventer, pump housing or heater.
Documented part details
| Manufacturer | Oase |
|---|---|
| Part reference | 53107 |
| Part description | Complete rotor |
| Documented pump | Aquafit 300 |
| Documentation | Oase spare-parts list, Aquafit 300 ice-preventer diagram |
| Supplied item | One replacement rotor assembly |
The manufacturer’s diagram identifies this rotor as a separate service part from the pump, housing, flap filter, hose and float. Those surrounding components are not included here. Check the exact reference in your equipment documentation before ordering, particularly if an older pump has an abbreviated model name on a previous invoice.
In that diagram, the complete pump has reference 19181 and the filter-and-pump housing has reference 17398. Part 53107 is the internal rotor replacement. Keeping these references separate helps identify whether the repair needs a rotor, a casing component or a complete pump.
Identify the original equipment
Locate the model information on the pump and compare it with its manual or spare-parts diagram. Part 53107 has documented Aquafit 300 use; the number should not be treated as a generic size or a guarantee of compatibility with every pump that includes 300 in its name.
A physically similar rotor can have different dimensions or a different relationship with the surrounding housing. Match the complete manufacturer reference rather than choosing only from an approximate visual resemblance. Keep the original model and part details with your maintenance record.
Distinguish a rotor from a complete pump
The rotor is an internal service component. Replacing it does not replace the pump’s electrical cable, motor housing, filter casing or the rest of the ice-preventer arrangement. Identify the affected component before deciding what needs replacing.
If the equipment has an electrical fault, a damaged cable or a cracked housing, this rotor alone is not a complete repair for that damage. Use the service procedure and correct parts intended for the pump. Do not modify another component to make an unsuitable replacement fit.
Check the pump before dismantling it
Disconnect and safely isolate the equipment as its instructions describe before reaching into the water or opening the pump. Prepare a stable work area and a container for wet parts. Keep the surrounding components organised so that the assembly can be returned to its documented arrangement.
Inspect the accessible filter and water path for accumulated debris. A restricted intake or an obstructed route can affect pump operation, so do not assume that every change in flow proves the rotor has failed. Follow the pump’s troubleshooting instructions and inspect the relevant components.
Use the documented access procedure
Remove the cover and service parts in the order specified for the pump. Avoid forcing a housing clip or using a tool as a lever against a fragile component. Check the old rotor assembly and the receiving chamber for damage or obstruction before installing the replacement.
Retain any separate support, seal or locating component that the manual requires, replacing it with the correct part if it is damaged. The rotor’s reference does not establish that every surrounding service item is supplied with it. Refit the assembly using the original documented arrangement.
Fit and check the replacement
Compare the replacement reference with the part selected for the pump. Seat it as the equipment instructions require and check that the surrounding parts are correctly located before closing the housing. If the assembly does not fit as intended, stop and check the part and component positions.
Reassemble the intake and casing without leaving loose debris in the water path. Make sure the cable and accessible housing remain in sound condition. Return the pump to the installation only after the service procedure and checks have been completed.
Restore the original operating arrangement
Follow the pump instructions for its position, water supply and restart. Do not run equipment dry or test it using an arrangement that the manufacturer does not permit. Observe its intended flow and check the accessible components after it has resumed normal operation.
Record the replacement date and the part number used. Regularly inspect the filter and water route as the equipment requires, especially after debris has collected around the intake. Keeping the installation maintained helps you distinguish a routine obstruction from a component that needs further attention.
Compare complete pond winter equipment
For a complete current pond-winter product, browse our pond heating range. A complete heater or ice-preventer has a different purchasing role from this internal rotor. For other model-specific repairs, see our pond pump accessories and choose the exact part documented for your equipment.




Reviews
There are no reviews yet.