







Pond Tap Water and Dechlorination: Choosing and Using a Water Purifier
Treating Tap Water for Pond Top-Ups and Water Changes
A hose-fed purifier can make regular pond top-ups much easier. A bottled conditioner can be a practical choice for smaller amounts of water. Either way, we would start with the same questions: what is in the incoming water, how much are you adding, and what do the instructions say for the exact product?
The treatment needs to match the job. A purifier with the tap running too quickly, or a conditioner measured against the wrong water volume, can give a false sense that everything has been dealt with. The useful checks are quite straightforward once you separate the equipment, the dose and the test.
Our starting advice: decide how you will treat the incoming water before opening the tap. Have the instructions, a way to measure the amount of water, and the right chlorine test to hand. If an existing setup has no record of its media or age, establish those details before relying on it.
Tap water that is suitable for people to drink still needs attention before it is used for fish. Chlorine and chloramine are relevant here. The Drinking Water Quality Regulator for Scotland explains that chloramination produces a longer-lasting disinfectant and that fishkeepers need treatment appropriate to their supply.
This guide deals with the water going into the pond. For pH, hardness, biological filtration and the readings already in the pond, use our guide to pond water conditions alongside it.
A Purifier, a Conditioner and a Chlorine Test Do Different Jobs
| What you use | What you need to establish | When it may suit |
|---|---|---|
| Hose-fed purifier | The exact media, treatment claims, flow instructions and replacement requirements. | A planned hose fill, regular top-ups or a suitably designed automatic supply. |
| Liquid conditioner | The named formulation, label dose, water volume and order of addition. | Measured batches, occasional top-ups, or another use expressly covered by its instructions. |
| Chlorine test | Whether it measures free or total chlorine, its range and units, and the correct method. | Checking a sample of the incoming or treated water. The test itself does not treat the water. |
We would not choose solely by pond size. Someone with a modest pond and a continuous top-up may put more water through a purifier over a season than someone with a much larger pond who rarely needs the tap. Equally, a large first fill may take longer than expected at the purifier’s specified flow.
Write down the job before comparing products: a one-off fill, a measured water change, topping up after filter cleaning, or a permanent trickle. Those are different demands. It also helps us work out whether you need a complete unit, a replacement cartridge, a conditioner or simply the correct test consumables.

Start with Your Water Supply, Not a Neighbour’s Result
Your water company is the place to check the supply serving your address. South East Water provides a postcode water-quality search and explains why a disinfectant residual is maintained through the distribution system. It also notes that how noticeable chlorine is can vary with the journey to a property and the time of day.
A water-quality report is useful background. It does not replace a correctly taken sample at the tap or purifier outlet when you need to check what the equipment is doing. If the report does not answer the chlorine or chloramine question, ask the supplier directly rather than trying to identify the disinfectant from smell.
For an example of why location matters, SES Water’s fishkeeping information sheet, dated July 2020, identifies monochloramine in its supplies. That statement should not be transferred to every other water company or treated as a reading for your own tap.
Before buying, we would want to know:
- Which company supplies the water at the property, and what it says about disinfection.
- Whether the tap is supplied directly from the mains, through a domestic softener, or from another source.
- The amount of new water you expect to use, including water replaced after filter cleaning.
- The exact equipment or conditioner already in use, with a photograph of its label where possible.
Choose the source tap carefully too. SES Water advises flushing the cold kitchen tap to reduce metals picked up from household pipework; that water can be collected for plants. Its fishkeeping sheet also notes that incoming tap water is generally cooler. Allow for the actual temperature difference when planning the water change.
Keep the two flushing jobs separate: clearing standing water from the supply pipe is one task; priming or flushing a new purifier according to its manual is another. Neither should be mistaken for proof that the final water has been dechlorinated.
How Slowly Does the Water Need to Pass Through a Purifier?
Start with the manufacturer’s figure for the precise unit. Do not copy the setting from a different purifier because both happen to be called “10-inch” or “three-stage”. Those names are not a universal performance standard.
Evolution Aqua’s Detox manual specifies a recommended flow of 4 litres per minute, with a lower flow giving better results. It recommends vertical installation, a first-use flush of 10 minutes until clear, a maximum working pressure of 4 bar, and protection from frost.
The same manual lists up-to treatment capacities of 225,000 litres for the 12-inch unit and 550,000 litres for the 30-inch unit, based on incoming chlorine at 0.5 ppm. These are conditional chlorine-capacity figures, not guaranteed replacement dates or chloramine-capacity ratings. The manual also calls for regular chlorine testing.
Evolution Aqua’s product page and manual mention chloramine, but its support FAQ gives an important qualification: the Detox was designed and tested for chlorine removal only, and chloramine-removal levels have not been tested. We would not use its chlorine-capacity figures as evidence that it will treat a chloraminated supply. Confirm a suitable treatment with the manufacturer and check the treated water using an appropriate total-chlorine method.
Measure the water coming out
A marked container and a timer make the flow easy to understand. Measure a known volume at the purifier outlet, using the hose, fittings and tap setting you intend to use for the fill. The calculation is:
Litres collected ÷ seconds taken × 60 = litres per minute
If 2 litres take 40 seconds to collect, the flow is 3 litres per minute. If the same 2 litres arrive in 20 seconds, it is 6 litres per minute. The second result would be above the 4-litre-per-minute recommendation in the Detox example; a hose that “looks fairly slow” is not a useful substitute for that measurement.
Check again after changing the tap setting or plumbing. A number written beside a valve is useful only while it still represents the water coming out. A compatible flow meter may make repeated checks more convenient, particularly where access makes collecting water awkward.
Allow enough time for the fill. At a steady measured 4 litres per minute, 600 litres takes 150 minutes: two and a half hours. That calculation excludes any preliminary flushing and checks. Plan the job around the treatment, rather than turning up the tap because you need to leave.
What the Burtons model names do and do not tell you
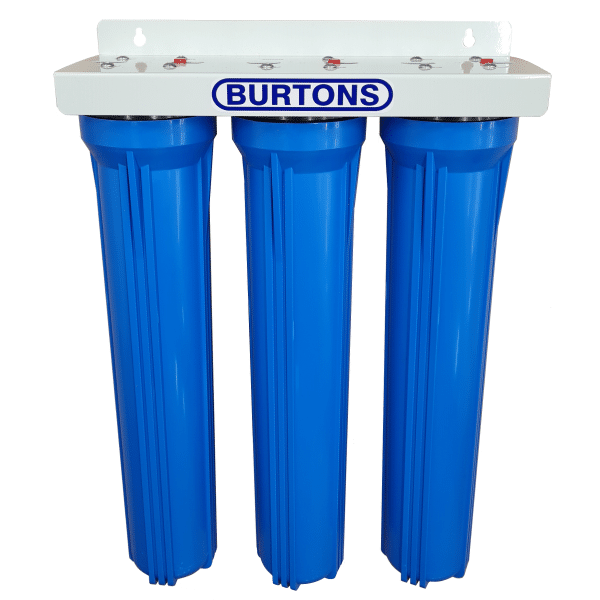
For the Burtons BA-DECHLOR-10, the manufacturer’s page lists 6 litres per minute and an approximate cartridge life of six months or 9,100 litres. Its three stages are a 5-micron sediment cartridge, granular activated carbon and a carbon block. Burtons specifies replacing all three cartridges; those details belong to that named model.
The BA-DECHLOR-20 page gives up to 8 litres per minute and approximately six months or 45,000 litres, with all three cartridges replaced. It also specifies first-use priming and bringing the unit indoors below 0°C. Follow the instructions supplied with your unit if its version differs.
We would not rank those capacities against the Detox figures as though they came from one identical test. Look for the conditions behind each number, then choose a setup you can operate and check properly. If the box, manual and an online specification disagree, pause the comparison and confirm the model with the manufacturer.
Capacity Is a Water-Use Figure, Not a Pond-Size Rating
A purifier does not know that your pond is 5,000 litres. What matters for its use record is the water that actually passes through it. A first fill, filter-cleaning top-ups and an automatic supply all contribute, even if the pond level hardly changes.
For example, an accurately measured 300 litres per week becomes 15,600 litres over 52 weeks. A separate 1,000-litre refill would bring that example’s total to 16,600 litres. It is a simple way to see why “we only top it up” can hide quite a lot of water over a year.
That arithmetic is a usage record, not a prediction that a cartridge will last a particular number of months. Keep the manufacturer’s time limit, capacity conditions and testing instructions alongside it. A low-use unit still needs its specified care; a busy unit may reach a volume limit well before a calendar reminder.
Record automatic top-ups as well
A float valve or controller can add water while you are not watching it. If the setup has a suitable water meter, note the reading when it is installed or serviced, then compare it at a regular check. Without a measurement, you are estimating consumption from the time a valve seems to be open.
It is worth noticing a sudden rise. Replacing more water than expected is a reason to investigate the pond, cleaning routine and supply arrangement. Installing a larger purifier does not explain why the extra water is being needed.
A useful notebook entry can be short: date, water volume or meter reading, measured outlet flow, exact cartridge set, chlorine result with units, and any change made. Keep a photo of the unit label with it. That gives you something reliable to refer back to when the media is due for replacement.
Using a Bottled Conditioner: Check Which Volume the Dose Is For
Do not assume every bottle is dosed in the same way. The important wording is often whether the amount is based on the new tap water, a separate prepared batch, or the whole pond when filling directly by hose.
| Product example | What the manufacturer says |
|---|---|
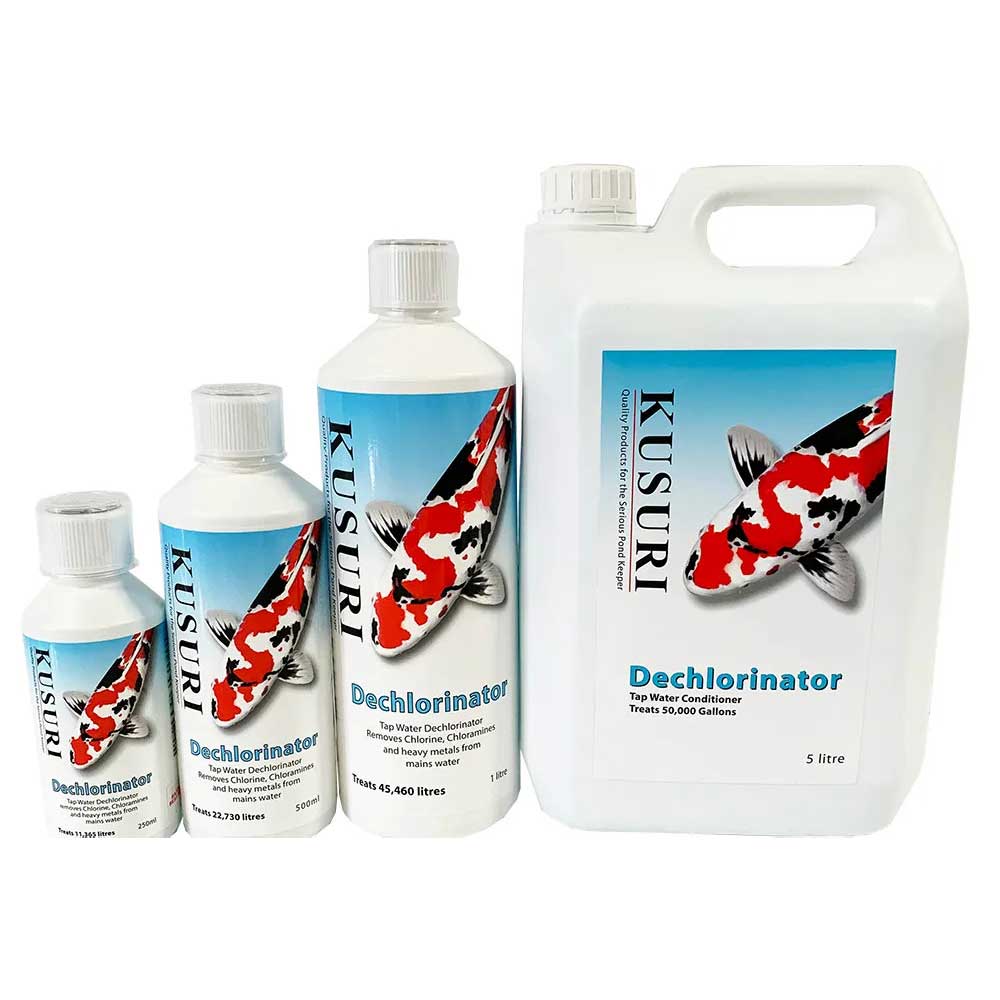
| Kusuri Dechlorinator | Measure for the volume of new tap water. The published dose is 10 ml per 100 gallons of new water. Check the bottle’s units before calculating. |
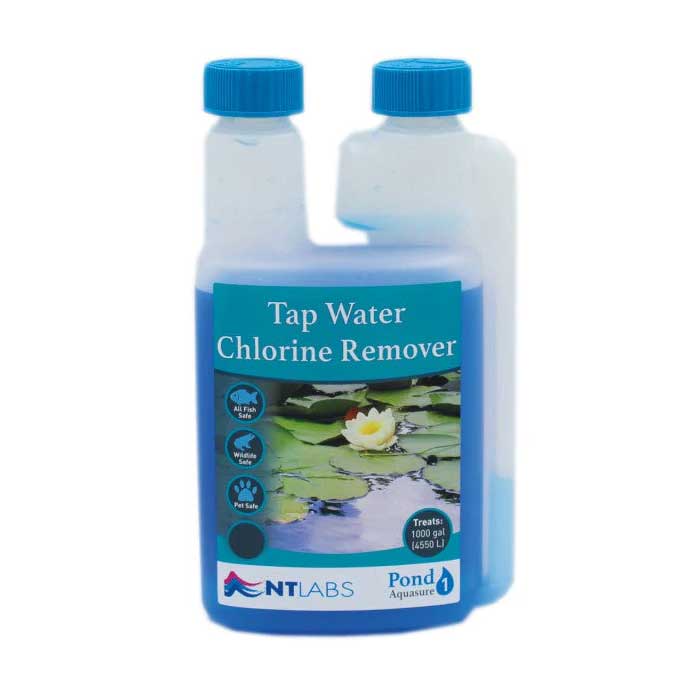
| NT Labs Aquasure / Tap Water Chlorine Remover | For a direct hose refill, dose for the entire pond volume. Shake the bottle, dilute the dose in a clean bucket of pond water and distribute it around the pond before topping up. Alternatively, treat smaller batches before adding them. |
Read the full Kusuri instructions or NT Labs instructions for the product you have. This comparison explains the difference in volume basis; it is not a dose to transfer to another bottle.
NT Labs’ published calculator gives 10 ml per 182 litres and says the label takes priority. For the separate-batch method, 182 litres is therefore a convenient illustration of a clearly stated volume. Do not use the size of that batch to override its whole-pond instruction when filling directly by hose.
We would write the relevant volume down before measuring anything. Check litres against gallons, distinguish pond volume from the water being replaced, and use a clearly graduated measure. A bottle cap is useful only if its graduations and instructions make the amount clear.
For a smaller measured batch, use a clean container appropriate for the water and follow the product’s mixing and addition directions. For a direct refill, establish the pond volume and the label’s sequence first. If you cannot resolve the instructions, ask before filling; averaging two different brands’ doses is not a solution.
Storage matters too. Kusuri specifies its original container, 2–30°C, and use within 12 months of opening, with gloves and goggles when handling it. Those are instructions for that product. Keep the actual bottle’s safety, storage and expiry information available rather than relying on a remembered shop description.
Plan the Water Change Before Draining the Pond
It is much easier to prepare the right amount of treatment before water has been removed. We would check that the replacement water can be supplied, treated and measured at a sensible pace, then allow time to stay with the job.
A small top-up after maintenance and a large refill deserve different planning. For the top-up, the missing volume may be straightforward to measure. For a substantial change, you need a credible pond volume, a clear reason for the change, and a plan for the fish and filtration throughout the work. This guide does not prescribe a single percentage for every pond.
Make the volume estimate honest
For a genuinely rectangular body of water, length × width × average water depth in metres × 1,000 gives litres. A 3 m × 2 m area at a true average depth of 0.8 m is 4,800 litres. Shelves, slopes, rockwork and irregular outlines change that volume; measuring the deepest point alone is not the same as finding the average.
If an original metered fill was recorded, keep that information. Check what it included, such as connected equipment, rather than assuming every old “pond size” note was measured. Our pond-volume guide explains how to allow for shelves and different depths. When a calculation is uncertain, record the uncertainty and resolve it before using the figure for a product whose directions depend on the whole system volume.
Keep the job manageable
- Set out the treatment. Identify the exact purifier or conditioner and have the instructions ready.
- Prepare the water route. Check the hose and connections and follow any model-specific first-use or restart directions.
- Measure. Establish the relevant volume and, for a purifier, the actual outlet flow.
- Check the treated water. Use the appropriate method before relying on the supply for the pond.
- Stay with the fill. Keep track of the level and amount added, then shut off the water and record the result.
Rushing the final stage because the tap has been running for hours is avoidable. Work out the likely filling time at the start and leave room for checks, rather than treating the arithmetic as an appointment to walk away.
Checking Chlorine: Free, Total and the Units on the Display
Free chlorine and total chlorine are different measurements. Hanna’s explanation of free and total chlorine describes total chlorine as free plus combined chlorine. A free-only test does not answer the whole total-chlorine question. Where compatible methods and units support it, total minus free estimates the combined fraction; it does not by itself identify a precise monochloramine concentration.
Take the sample from the place you actually want to check. Water from the tap before a purifier tells you about the incoming supply. Water from its outlet tells you about that treated sample. Water taken from the pond answers a different question and may already have been diluted and mixed with the existing pond water.


Read the range and accuracy together
The HI761 manufacturer’s specification gives a 0–500 ppb total-chlorine range, 1 ppb resolution and accuracy at 25°C of ±5 ppb plus ±5% of the reading. Resolution is the display step; it is not a promise that every displayed digit is exact.
Hanna’s HI762 specification also gives a 0–500 ppb range and 1 ppb resolution, but it measures free chlorine and has a different stated accuracy: ±20 ppb plus ±4% of the reading at 25°C. Check the model number rather than choosing by the words “ultra low range” alone.
For dilute water results in these units, 1,000 ppb equals 1 mg/L. A reading of 100 ppb is 0.100 mg/L; 500 ppb is 0.500 mg/L. Write the unit alongside the number every time. A notebook entry saying only “0.1” leaves the next person guessing.
Measurement uncertainty also matters when subtracting results. If total and free chlorine are close, the difference may be small compared with the uncertainty in the two methods. A negative calculated difference is a reason to review the samples and methods, not to report negative combined chlorine.
The reagent and timing are part of the test
The manufacturer-linked HI761 manual uses a 10 ml sample, the matching total-chlorine reagent, gentle mixing for 20 seconds and a timed reaction of 2 minutes 30 seconds. It also distinguishes a blinking under-range zero from an ordinary result. Follow the full sequence in the manual supplied with your instrument.
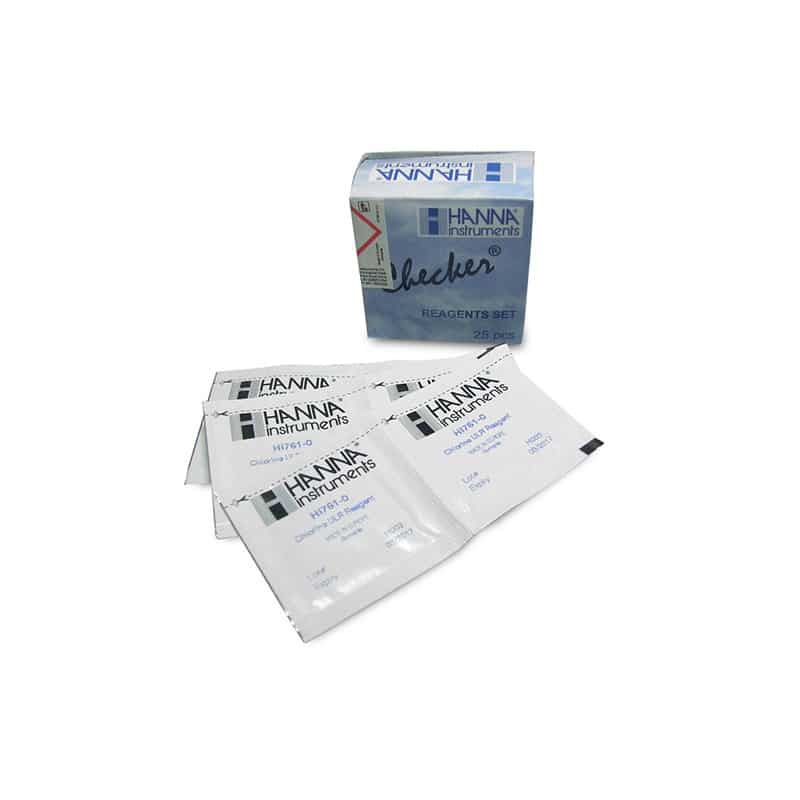
For this model, HI761-25 replacement reagents are the matching 25-test pack. Hanna’s reagent guidance stresses expiry information, a clean sample, a dry fingerprint-free cuvette exterior and avoiding bubbles. Do not substitute a free-chlorine packet because it looks similar.
A HI761-11 check set has a separate purpose. Hanna describes it as a way to validate the checker, with certified reference values and an expiry date. It does not replace the reagent used to test your own water or turn the checker into a test for every pond parameter.
Replacement Media, Winter Storage and Keeping the Setup Dependable
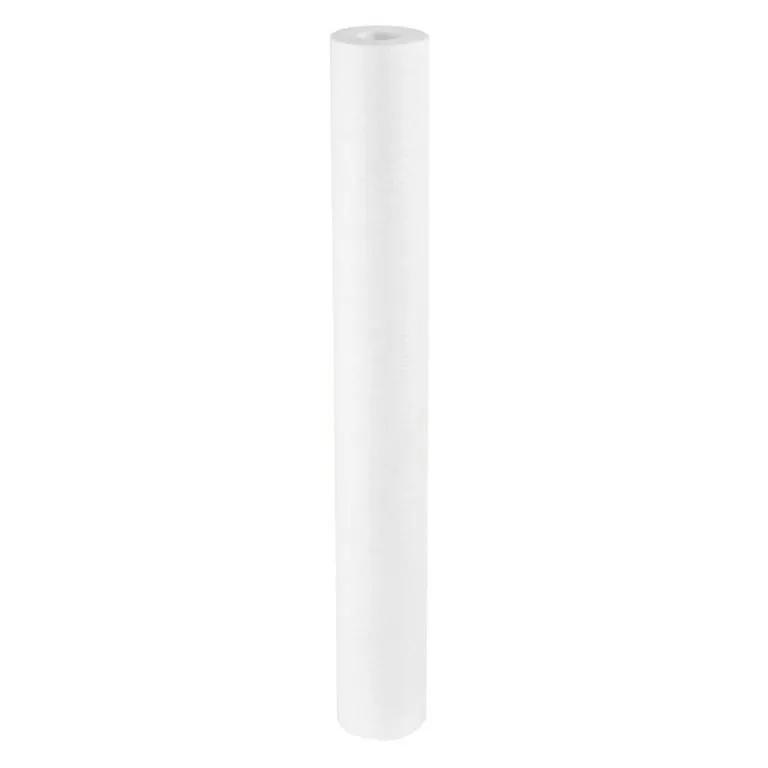
When it is time to buy cartridges, take the old unit’s details with you. The useful information is the manufacturer, housing model, cartridge length, cartridge type and arrangement. “A carbon filter for a pond” is not enough to select a replacement confidently.
For a staged unit, keep a record of each position rather than replacing a sediment cartridge with a carbon cartridge simply because it fits the space. Use the correct seals and the supplied service procedure. If the arrangement has been altered since purchase, establish what is fitted before ordering another set.

Keep the replacement reminder somewhere you will see it. Record both the date and water use, together with the manufacturer’s instructions, rather than relying on a note saying “changed last summer”. If several people look after the pond, make sure the same record is available to everyone.
Before winter, read the storage directions for the equipment actually installed. Work out how you will treat any water needed while a unit is drained or stored. A shut-down purifier and an automatic top-up should not become two separate jobs that nobody connects.
After a service, do not regard the new cartridges as the end of the job. Reassemble, prime or flush as instructed, check the connections, measure the operating flow and check the outlet water. Record which set was fitted so the next order is based on the installation you now have.
When the Result Is Not What You Expected
If the treated-water result is unexpected, stop relying on that supply while you investigate. First establish that the sample, instrument and method are right. Then check the treatment setup. Buying another bottle or opening the tap further before identifying the problem only makes the next result harder to interpret.
| What you have noticed | What we would check next |
|---|---|
| A chlorine result at the purifier outlet | Confirm free or total, units and test procedure. Recheck outlet flow, exact media and replacement record against the unit’s instructions. |
| A zero that flashes or an error appears | Read the instrument’s error description. Do not copy an under-range or over-range indication into the notebook as an ordinary zero. |
| A conditioner dose seems unexpectedly large | Check whether the instructions use the whole pond or new-water volume, and whether the calculation uses litres or gallons. |
| Water use has risen sharply | Check the actual meter record, recent cleaning and the top-up arrangement. Find the reason rather than only revising the media reminder. |
| The pond still has other poor readings | Investigate those parameters separately. Successful incoming-water treatment is not proof that ammonia, nitrite, pH or the filter are right. |
If a conditioner has been used and you are unsure how to interpret the test, give the manufacturers the exact product, dose, sample location and test model. Ask about the combination rather than assuming every treatment and analytical method behaves identically.
For fish showing distress, treat it as a pond-health problem that needs prompt assessment, not an opportunity to keep experimenting with a purifier setting. Keep the observations and water readings together and get suitable help. Our ammonia and nitrite guide explains those particular readings without confusing them with a chlorine check.
Pond Dechlorination Questions
Can I just leave tap water standing overnight?
We would not use a fixed overnight waiting time as a guarantee for an unknown supply. Check which disinfectant is used and choose treatment that covers it. A calendar interval, an absent smell and a chlorine result taken by the wrong method answer different questions.
Does a larger pond need the largest purifier?
Look at the amount of incoming water, the filling time you can allow, and the exact model’s operating and replacement instructions. Pond volume helps plan a fill, but it does not tell you how much water will pass through the purifier over the following season.
Do I need conditioner as well as a purifier?
Choose a supported treatment method for the job and check that it is working. Do not assume two products used together are automatically better, or add a second product to avoid investigating a failed first one. If you want a backup method, plan it around that product’s own instructions before it is needed.
Does a zero chlorine result mean the pond water is perfect?
No. It is a result for that sample and method, within the method’s limitations. It does not measure every water-quality issue or guarantee that a purifier will perform unchanged on its next use. Keep incoming-water treatment and the pond’s wider testing routine connected.
What should I send you if I need help choosing?
A photograph of the existing purifier or conditioner label, the supply company, the pond’s best available volume record, the amount of water you normally add and any recent results with units. Those details let us discuss the actual setup instead of guessing from a cartridge’s colour or the size of a pond photograph.
Choosing Equipment You Can Use and Maintain Properly
The most useful setup is one whose instructions you can follow every time: measured water, a manageable flow or dose, an appropriate check, and replacement parts you can identify. Make those decisions together rather than buying the purifier first and leaving the testing until something seems wrong.
Our pond-water purifier range is a starting point for comparing equipment. If you already have a unit, use its details to find the correct replacement cartridges. We can help you work through the model and the job before you order.
Product figures and examples above are linked to the relevant manufacturer instructions. Always use the directions supplied with your exact unit, bottle or test instrument; confirm a discrepancy before use. Water-company information explains the supply, while your correctly taken samples help check the water you are actually using.
